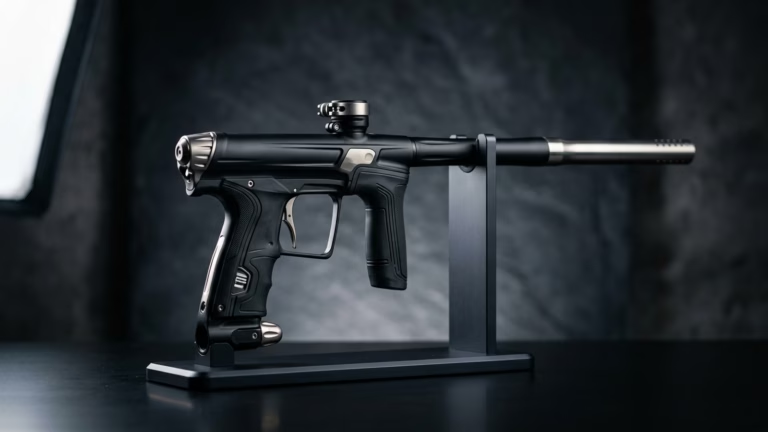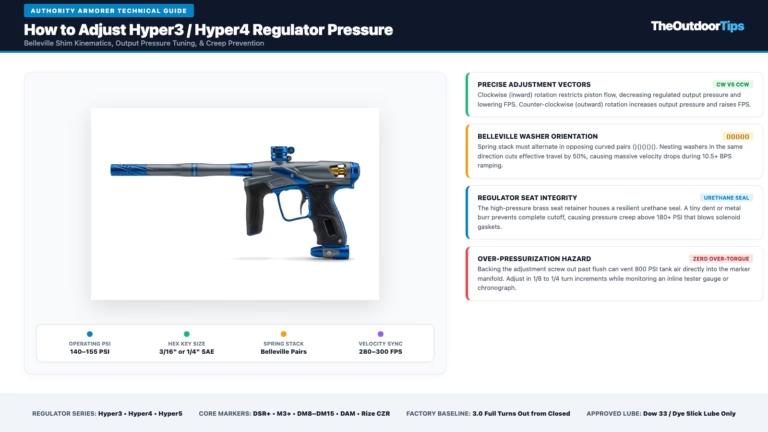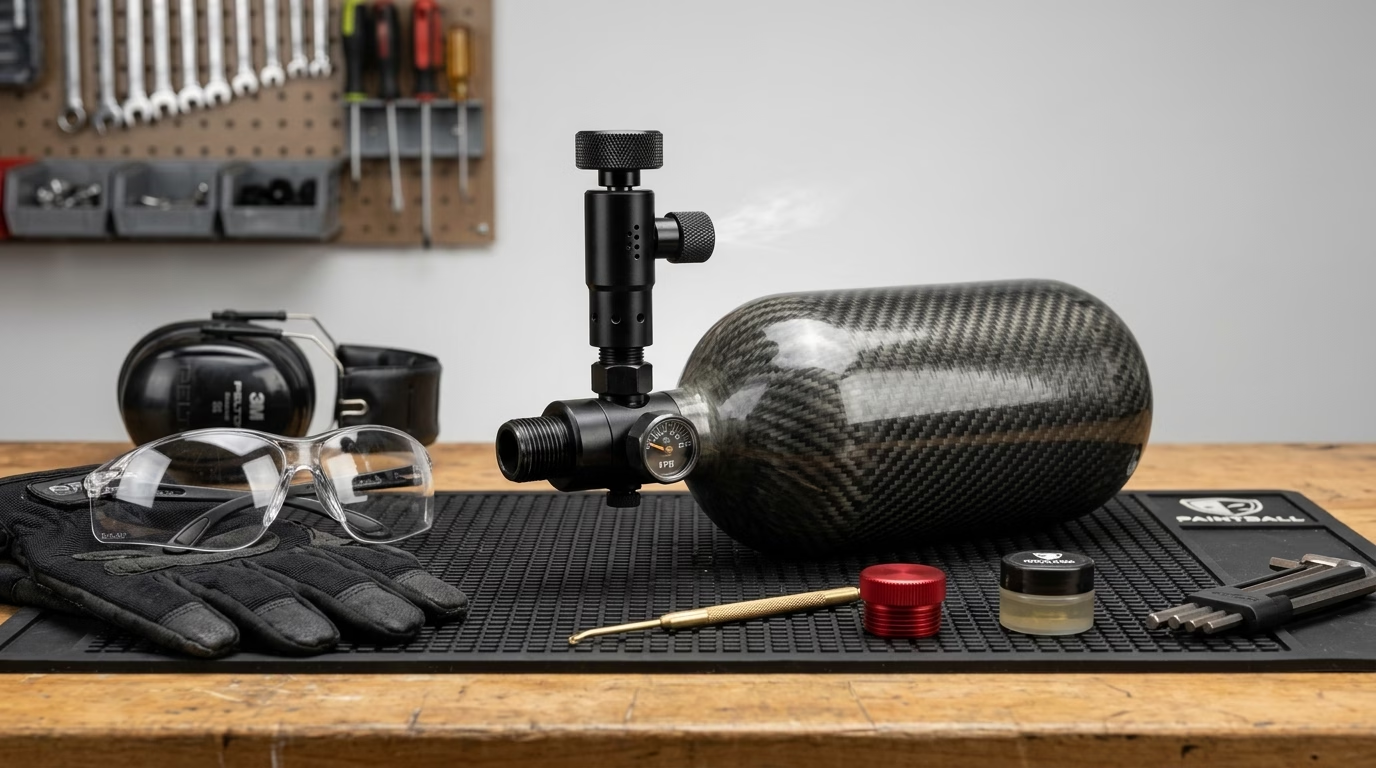
Whether you need to ship a cylinder through commercial mail, prep a carbon fiber bottle for its mandatory five-year hydrostatic re-test, or replace a leaking regulator bonnet (or replace a blown burst disk), knowing how to safely empty paintball tank cylinders at home is an indispensable armorer skill (vital when evaluating how to tell if a paintball tank is expired before re-certification). In our field tests and match clinics across more than a decade of competitive tournament play, treating a high-pressure air (HPA) bottle like a common household container is the fastest route to catastrophic property damage or severe acoustic trauma. A fully charged 68 ci / 4,500 PSI carbon fiber bottle contains over 81,000 Joules of kinetic potential energy—equivalent to a one-ton vehicle traveling at 30 miles per hour. When players atattempt to drain high-pressure cylinders using crude methods like striking the pin valve with a punch or rock, the extreme thermodynamic pressure drop causes instant cryogenic freeze burns and seal destruction. Below is our definitive step-by-step armorer protocol to safely, quietly, and thoroughly empty paintball tank hardware at home.
Key Technical Takeaways: Safe Tank Degassing
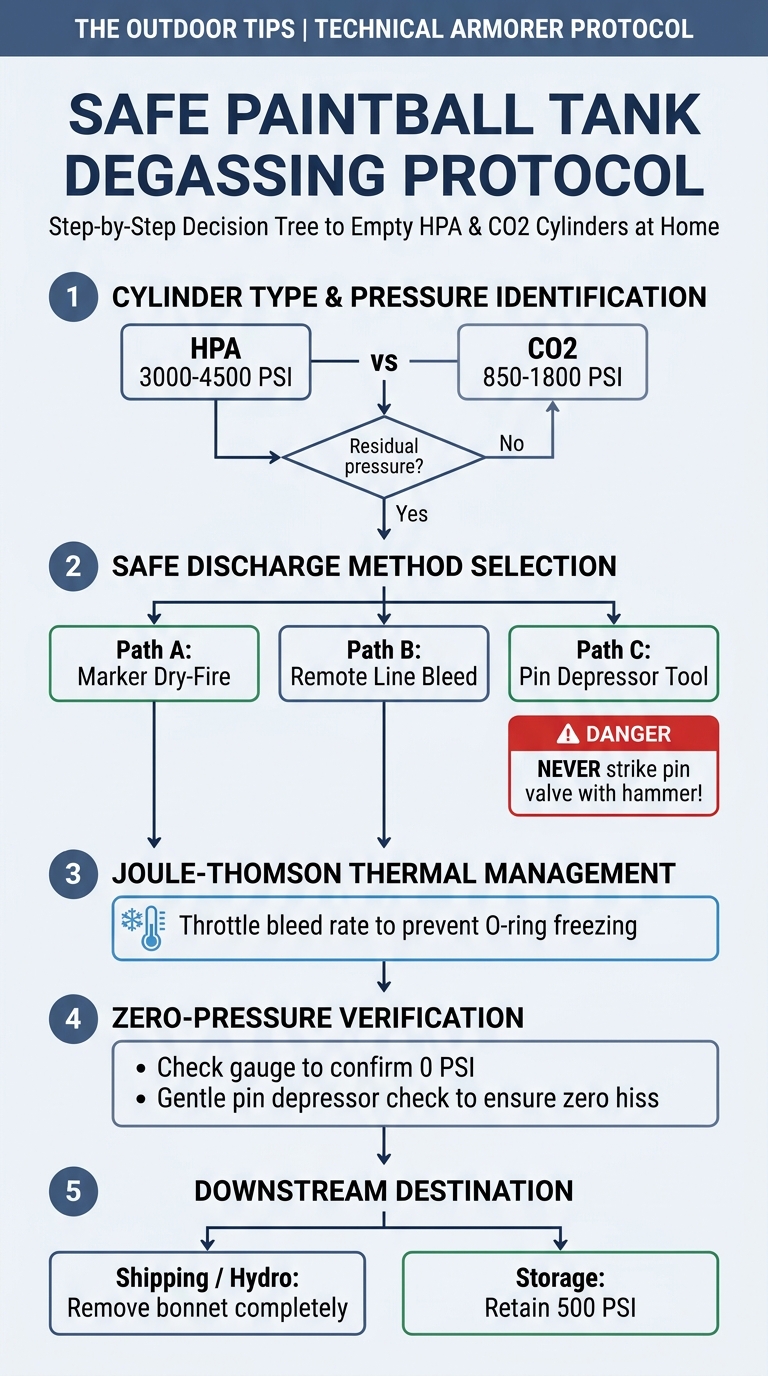
To safely empty paintball tank cylinders without damaging internal regulator shims or risking projectile injury, always use a mechanical bleed interface like an on/off ASA or a remote line slide check. Control the flow rate to mitigate severe Joule-Thomson cooling, which can drop venting temperatures down to −40°F (−40°C) and permanently destroy polyurethane O-rings.
81,000+ Joules
68ci / 4500 PSI Kinetic Potential
≈ 23.46 lbf
At 850 PSI Regulated Bonnet
−40°F (−40°C)
Joule-Thomson Thermal Drop
125+ Decibels
Requires Hearing Protection
- The Lethal Punch-and-Hammer Myth: Never attempt to depress the pin valve by striking it with a screwdriver, pin punch, or hammer. Under 850 PSI regulated bonnet pressure (or up to 4,500 PSI if the regulator piston fails), a loose punch becomes an unrestrained steel projectile, while the violent sideways shear bends the internal regulator pin stem, ruining the bonnet.
- Joule-Thomson Freeze Fracture: Rapidly exhausting high-pressure gas causes thermodynamic expansion cooling (ΔT = μJT × ΔP). Venting an entire 4,500 PSI bottle in under 60 seconds drops the aluminum bonnet temperature below −40°F (−40°C). This extreme chill causes 90-durometer polyurethane #015 O-rings to shatter like glass and contracts brass seats, causing permanent leaks. Always bleed slowly over 3 to 5 minutes.
- Shipping Regulations (DOT-SP 49 CFR § 173.306): If you are shipping an HPA or CO2 cylinder via USPS, FedEx, or UPS for hydro-testing or resale, federal law mandates that the bottle must be 100% depressurized (0 PSI). For hydrostatic testing, the regulator must be completely unscrewed and detached from the bottle to allow visual internal inspection by certified technicians.
Physics of Degassing: Why You Must Carefully Empty Paintball Tank Vessels
Releasing thousands of pounds per square inch of compressed gas involves serious thermodynamic, mechanical, and acoustic forces. When you prepare to empty paintball tank hardware, armorers manage four critical physical phenomena:
- Joule-Thomson Cryogenic Cooling: When high-pressure air expands rapidly through a narrow orifice into ambient atmospheric pressure (14.7 PSI), the gas molecules move farther apart against intermolecular attractive forces. This work consumes internal thermal energy, producing a drastic temperature drop governed by the Joule-Thomson effect: ΔT = μJT × ΔP. Unchecked venting can drop the regulator metal below −40°F (−40°C), creating severe frostbite hazards on bare skin and cracking polymer valve seats.
- Pneumatic Thrust Reaction Force: High-pressure venting creates tremendous directional reaction thrust (F = ṁ × ve + (Pe − Pa) × Ae). If a tank is discharged unrestrained on a concrete floor or bench, the sonic exhaust can spin or launch the 2-to-3-pound cylinder like a ballistic rocket. Bottles must be held securely in a padded vise, connected to a marker chassis, or restrained in heavy leather gloves during discharge.
- Pin Valve Mechanical Thrust Resistance: The regulator pin valve is held closed by a combination of an internal coil spring and regulated output pressure (refer to our guide on paintball operating pressures). For a standard 0.825″-14 NGO pin with a contact area of approximately 0.0276 sq inches, opening the valve against 850 PSI requires: F = P × A ≈ 850 PSI × 0.0276 in2 ≈ 23.46 lbf. Attempting to push this with a handheld tool slips easily, galling the brass pin head.
- Sonic Acoustic Pressure Wave: High-velocity gas jetting through a 2mm pin valve aperture reaches sonic speeds (Mach 1+), producing high-frequency acoustic shock waves that exceed 125 decibels. Unprotected ears risk immediate tinnitus or eardrum rupture. Always wear certified hearing protection or muffle the exhaust port with a folded microfiber towel.
Master Comparison Matrix: Safe Methods to Empty Paintball Tank Cylinders
Depending on the tools available in your home workshop, several approved methods exist to empty paintball tank cylinders safely. Reference our technical comparison table below to choose the safest method for your setup:
| Degassing Method | Safety Rating | Operational Mechanics & Control | Recommended Tool Link |
|---|---|---|---|
| Marker On/Off ASA Dry-Fire Safest & quietest method |
10 / 10 (Gold Standard) | Mount bottle to marker; turn on/off ASA knob inward to depress pin valve; remove hopper/paint; point downrange and dry-fire in semi-auto until pressure drops to 0 PSI |
Planet Eclipse POPS On/Off ASA
|
| Remote Line Slide Check Bleed Controlled workbench venting |
9.5 / 10 (Highly Recommended) | Screw remote line bottle adapter onto bonnet; open on/off knob; slide the quick-disconnect slide collar halfway back to vent air slowly through exhaust holes |
Ninja Remote Line with Slide Check
|
| Dedicated Pin Depressor Bleed Tool Compact armorer key |
9.0 / 10 (Field Portable) | Screw CNC aluminum bleeder cap onto 0.825″-14 NGO threads; rotate thumbscrew clockwise to engage pin valve; wrap a towel around side bleed port to dampen sound |
Paintball Tank Bleed / Degasser Tool
|
| Manual Punch / Screwdriver Strike Uncontrolled brute force |
0 / 10 (PROHIBITED & LETHAL) | Striking the pin with a screwdriver or punch; creates flying shrapnel, freezes hands, bends pin stems, and ruins regulator bonnet threads permanently | DO NOT ATTEMPT — EXTREME HAZARD |
Step-by-Step Execution: How to Empty Paintball Tank Cylinders at Home
In our technical armorer clinics, we train field staff and tournament players to execute complete cylinder degassing using three disciplined, workshop-proven methods. Follow these numbered steps to safely depressurize your air system:
Method 1: The Marker On/Off ASA Dry-Fire Method (Recommended)
This is the safest, quietest, and most controlled method to empty paintball tank hardware because the marker’s inline regulator and bolt assembly naturally buffer the sonic shock waves and thermodynamic chill:
- Clear the Marker of Paint and Feed Systems: Remove the loader, unclamp the feedneck, look down the breech to confirm no paintballs are chambered (if blocked, review how to remove a stuck paintball from the barrel), and install an ASTM-compliant barrel-blocking device (barrel sock).
- Mount Tank and Engage On/Off ASA: Thread the cylinder into the marker’s on/off ASA (ensuring the tank bonnet O-ring is in place and avoiding paintball tank threads stuck in the ASA). Slowly rotate the ASA knob clockwise or engage the purge lever to actuate the pin valve (if stiff or binding under pressure, consult our paintball on/off ASA stuck fix). Verify that the marker airs up without external leaks.
- Cycle the Action Downrange: Power on the board (if experiencing electronic issues, consult our paintball gun won’t turn on troubleshooting checklist) and turn off the anti-chop eye sensors. Point the marker into a safe backstop or trap (such as a cardboard box filled with rags) and cycle the marker in semi-automatic mode at a steady pace of 4 to 6 shots per second. Continue firing until the bolt begins sluggishly short-stroking (similar to drag caused by paintball bolt stick in cold weather) and stops cycling completely.
- Purge Residual Plenum Pressure: Turn off the marker power. Disengage the on/off ASA lever or knob. Pull the trigger twice to vent any air trapped between the inline regulator and the bolt chamber. Check the tank’s analog pressure gauge to confirm it reads 0 PSI.
Method 2: The Remote Line Slide Check Bleed Method
If you have an unmounted cylinder and do not wish to dry-fire a marker hundreds of times, a standard coiled paintball remote line setup equipped with a slide check collar provides excellent workbench control:
- Attach Remote Line Adapter to Bottle: Ensure the remote line’s bottle on/off knob is turned fully counter-clockwise (closed). Thread the remote adapter onto the tank’s 0.825″-14 NGO bonnet threads until snug.
- Position the Quick-Disconnect Slide Check: Push the brass slide check collar forward (toward the quick-disconnect male nipple) to open the internal line channel. Ensure the open end of the hose is directed away from your body into an open, well-ventilated space.
- Slowly Open the Bottle Knob: Rotate the remote on/off knob clockwise half a turn to depress the tank pin valve. High-pressure air will rush through the coiled line and exit through the open quick-disconnect fitting.
- Throttle Bleed Rate Against Freeze: Do not open the valve fully. Maintain a steady, moderate acoustic hiss. If frost or white ice crystals begin forming on the regulator body or hose fittings, pause discharge for 60 seconds to allow ambient heat to warm the metal. Continue until air exhaust drops to zero and the gauge needle rests firmly against the zero-stop pin.
Method 3: Dedicated Pin Depressor Bleeder Tool Method
For armorers performing routine teardowns and maintenance (how to service a paintball regulator), compact CNC-machined degassing caps screw directly onto regulator bonnets to depress the pin valve smoothly:
- Inspect Threads and O-Ring: Verify that the tank bonnet threads are clean and free of metal burrs. Ensure the bonnet’s #015 urethane O-ring is seated in its groove to prevent erratic side-venting.
- Screw Bleeder Tool Hand-Tight: Thread the degassing tool onto the bonnet until it seats firmly against the O-ring. Ensure the tool’s actuation knob or thumbscrew is backed fully out.
- Wrap with a Shop Towel for Sound Damping: High-pressure air exiting a bleeder tool generates ear-piercing shrieks. Wrap two layers of clean shop towels around the tool exhaust port and wear ear protection.
- Turn Actuator Screw Clockwise: Slowly tighten the actuator screw until you hear air begin venting. Let the tank exhaust steadily over 3 to 5 minutes until fully depressurized.
DOT-SP & OSHA Cylinder Depressurization Mandates
Under Federal Department of Transportation regulations (49 CFR § 173.306) and Compressed Gas Association (CGA) standards, compressed air cylinders sent for 5-year hydrostatic testing or shipped via air cargo must be completely empty. Never attempt to remove a regulator bonnet with a strap wrench or bench vise until you have performed the Two-Stage Zero Verification: first, confirm 0 PSI on the analog gauge; second, depress the pin valve with a brass tool to confirm zero residual plenum thrust. Attempting to unscrew a regulator containing residual pressure can strip aluminum threads explosively, causing catastrophic shrapnel injuries.
Essential Armorer Tools to Empty a Paintball Tank Safely
To safely execute cylinder degassing and regulator maintenance in your home shop, equip your armorer workbench with these field-tested supplies:
| Tool / Supply Name | Armorer Function | Key Technical Spec | Direct Procurement Link |
|---|---|---|---|
| Ninja Paintball Remote Line Coil with Slide Check | Controlled workbench degassing and on/off air throttling | 4500 PSI working pressure; integrated slide check valve; standard ASA bottle adapter | |
| Heavy-Duty Rubber Strap Wrench Set | Safe regulator removal from cylinder neck without marring aluminum | Reinforced rubber strap; non-slip grip; up to 6-inch diameter capacity for bottles | |
| 3M Peltor Optime 105 Hearing Protection | Protects against 125+ dB sonic noise during high-pressure tank exhaust | 30 dB Noise Reduction Rating (NRR); double-shell technology; ANSI S3.19 certified | |
| Aluminum Thread Saver & Cap Protector | Protects 0.825″-14 NGO threads and pin valve after depressurization | CNC-machined 6061-T6 aluminum; internal O-ring seal; prevents debris intrusion |
Video Demonstration: Safely Draining HPA Tanks & Removing Regulators
Watch this practical technical demonstration showing the exact procedure for completely degassing an HPA bottle and safely breaking regulator bonnet torque:
Final Armorer Verdict: Safest Way to Empty Paintball Tank Systems
Whether calibrating marker velocity on the chronograph or preparing for maintenance, when you need to empty paintball tank cylinders, patience and proper mechanical tooling prevent catastrophic accidents. The dry-fire on/off ASA method remains our gold-standard recommendation because the marker naturally muffles deafening sonic shock waves and regulates air discharge rate. If dry-firing is unavailable, a remote line with a slide check gives you precise tactile throttle control over venting speed. Always bleed slowly over 3 to 5 minutes to avoid cryogenic thermal shock to your O-rings, and never attempt to break regulator threads until the analog gauge reads 0 PSI and the pin valve yields zero resistance upon manual inspection.
Frequently Asked Questions About Emptying Paintball Tanks
Can I depressurize a cylinder by pressing the pin valve with a screwdriver?
No. Never press a pin valve with a screwdriver, pin punch, or metal rod. Under 850 PSI regulated bonnet pressure, pushing against the pin valve requires over 23 pounds of direct force. The tool can slip violently, damaging the brass pin head or puncturing your hand. Furthermore, unrestricted air venting generates 125+ dB acoustic shock waves and freezes the valve instantly. Always use a threaded mechanical degassing tool, remote line, or on/off ASA.
How long does it take to safely drain an HPA cylinder?
A full 68 ci / 4,500 PSI HPA bottle should be emptied steadily over 3 to 5 minutes. Venting too quickly causes severe Joule-Thomson cooling, dropping the regulator temperature below −40°F (−40°C). This extreme freeze embrittles polyurethane O-rings, contracts metal seals, and can cause permanent leaks. If you see frost forming on the regulator, pause discharge for 60 seconds.
Do I have to empty my paintball tank before flying or shipping?
Yes. Under FAA, TSA, and commercial courier regulations (USPS, FedEx, UPS), pressurized cylinders are classified as Division 2.2 hazardous materials and are prohibited in checked baggage or standard parcel post unless completely depressurized. For commercial flights, TSA strictly mandates that the tank must not only be at 0 PSI, but the regulator must also be completely removed so security screeners can inspect the inside of the bottle.
Is emptying a CO2 tank different from emptying an HPA tank?
Yes. CO2 tanks store gas as a liquid at 850 to 1,800 PSI. When venting CO2, the liquid boils into gas, absorbing immense amounts of heat. Inverting a CO2 tank during venting sprays liquid CO2 at −109°F (−78.5°C), creating immediate frostbite hazards. Always keep CO2 tanks upright (valve pointing up) and vent very slowly outside in an open area to avoid carbon dioxide gas accumulation.
Should I store my paintball air cylinder completely empty at 0 PSI during winter?
No. If you are simply storing your cylinder at home over the winter off-season (as detailed in our guide on how to store a paintball gun during off-season) and not shipping or hydro-testing it, leave 500 to 1,000 PSI of clean compressed air in the bottle. Maintaining positive internal pressure keeps the regulator seat firmly pressed and prevents ambient moisture or humid room air from migrating inside the aluminum or carbon fiber vessel.
How do I know my paintball tank is 100% empty before removing the regulator?
Always execute the Two-Stage Zero Verification protocol: first, verify that the tank’s analog pressure gauge needle is resting solidly on 0 PSI; second, take a non-scratch brass pick and gently depress the pin valve. The pin should move freely 1.5mm inward with zero resistance and zero acoustic hiss. Only when the pin valve moves freely without escaping gas is the cylinder safe for regulator removal.