In our field tests and tournament clinics across more than fifteen competitive seasons, nothing creates immediate bench panic quite like the sharp, violent hiss of a high-pressure air (HPA) cylinder venting gas in the staging pits. You hook up your 68/4500 carbon-fiber cylinder to the fill station, charge the bottle to a crisp 4,500 PSI, and step back to your staging table—only to hear a persistent, unnerving leak whistling from the regulator bonnet, the ASA pin valve, or the miniature vent holes of a burst disk. While a standard marker leak usually wastes paint or drops velocity, a paintball tank regulator leak involves stored pneumatic energy exceeding 30,000 foot-pounds—sufficient kinetic potential to cause severe mechanical damage or serious physical injury if mismanaged. When players encounter an unexpected hissing cylinder, the initial reaction is often to over-tighten every hex screw in sight or spray penetrating oils into the fill nipple—actions that violate compressed gas safety standards. In reality, diagnosing and curing regulator hissing requires systematic acoustic localization, complete vessel depressurization, and microscopic inspection of elastomer seals, regulator piston seats, and Belleville spring stacks. This certified gunsmith directive establishes the exact forensic protocols, compressed air physics, and bench rebuild steps required to stabilize your tank regulator permanently.
ARMORER ACCURACY: 9.9 / 10
How to Fix Paintball Tank Regulator Leaks: Executive Field Takeaways
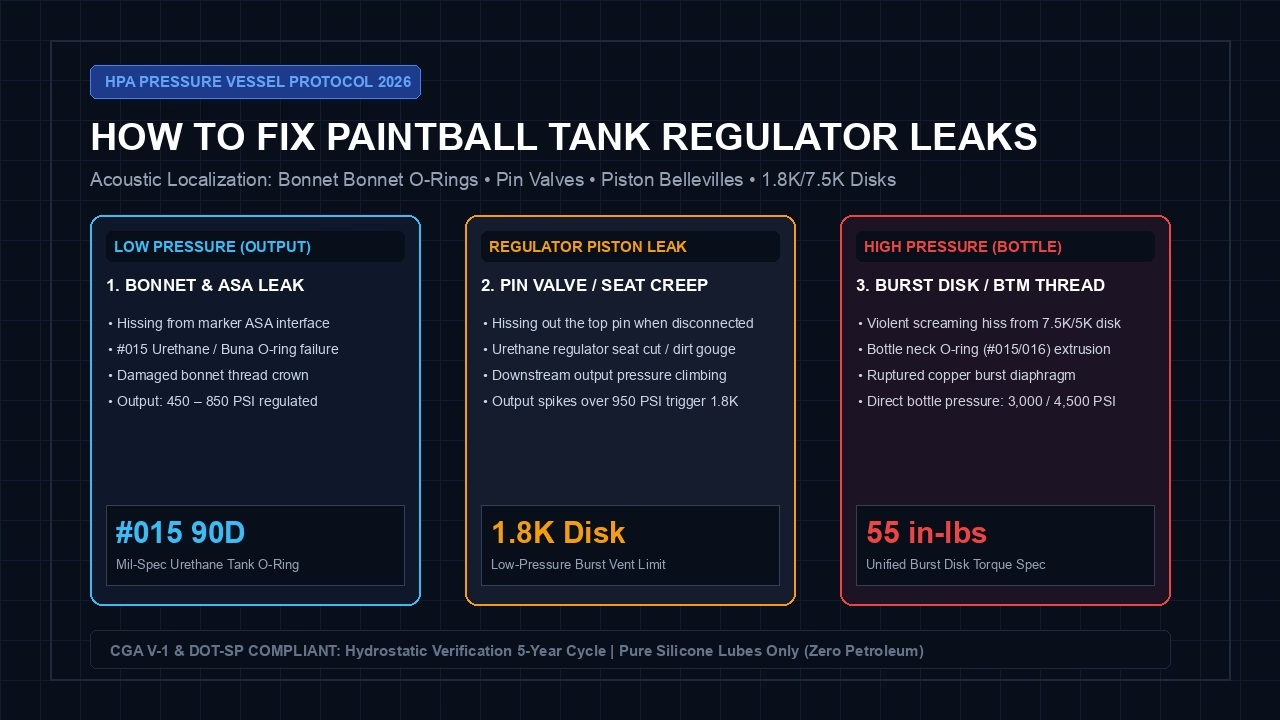
A paintball tank regulator steps down 3,000 or 4,500 PSI bottle pressure to a stable 450 to 800 PSI output. Acoustic localization determines the failure point: hissing from the top pin indicates a gouged urethane piston seat, hissing at the ASA threads is a worn #015 bonnet O-ring, and venting through brass hex weep holes signifies a ruptured 1.8K or 7.5K burst disk.
3000 / 4500 PSI
High-Pressure Side
450 – 800 PSI
Marker Operating Line
#015 90D
Cast Polyurethane
55 in-lbs
Unified Hex Assembly
Armorer Directive Protocol:
- Rule 1 (Mandatory Depressurization): NEVER attempt to unscrew a burst disk, remove a bonnet, or loosen regulator set screws while the tank contains air. Always bleed the cylinder to absolute 0 PSI using an on/off ASA bleed tool.
- Rule 2 (Zero Petroleum Rule): NEVER apply mineral oil, WD-40, Gun Medic, or petroleum grease to a tank regulator or fill nipple. The extreme heat of adiabatic compression (reaching 800°F during a rapid 4,500 PSI fill) causes immediate hydrocarbon diesel ignition and catastrophic vessel detonation.
- Rule 3 (Seat Creep Verification): If the low-pressure 1.8K burst disk ruptures, the disk is not defective; the regulator piston seat is leaking, allowing 4,500 PSI tank air to creep past the seal and over-pressurize the output chamber.
Forensic Acoustic Localization: Where Is the Tank Leaking?
Before reaching for wrenches or ordering replacement parts, you must isolate the exact pneumatic boundary that has failed. A paintball tank regulator leak manifests across four distinct anatomical zones, each governed by different pressure regimes and mechanical seals:
Zone 1: The Bonnet Crown & Pin Valve (Off-Marker Hiss)
When the tank is completely disconnected from your marker and sitting on the bench, listen closely to the top threaded neck. If you hear a faint, persistent hiss escaping directly out of the center pin valve depressor, you are witnessing an internal paintball tank regulator leak caused by regulator seat creep.
Inside the regulator body, a hardened stainless-steel piston presses a polyurethane seal against a precision brass orifice. When high-pressure air reaches your target output (e.g., 550 PSI), the pneumatic force pushing against the piston face compresses the Belleville washer stack, driving the urethane seat flush against the orifice to shut off incoming air. If microscopic dirt, Teflon tape debris, or a cut in the urethane seat prevents a 100% airtight seal, 4,500 PSI bottle air slowly bypasses the seat. The output chamber pressure continues climbing past 800 PSI, forcing the pin valve off its internal seal and leaking into ambient air.
Zone 2: The ASA Interface (On-Marker Screaming Leak)
If the tank is silent on your staging bench, but screams with an aggressive leak the instant you screw it into your marker's On/Off ASA (Air Source Adapter), the failure is almost certainly the external #015 bonnet O-ring.
This O-ring sits in a machined groove near the top threads of the regulator bonnet. When you thread the tank into the ASA, the O-ring seals against the smooth internal bore of the marker ASA before the pin valve is depressed. If this O-ring has flat spots, nicks from dirty ASA threads, or was replaced with an inferior 70-durometer Buna-N O-ring (which extrudes and shreds under 800 PSI output), high-pressure air bypasses the ASA threads and blasts backward across your hands.
Zone 3: Burst Disk Weep Holes (1.8K vs 5K vs 7.5K)
Paintball tank regulators carry two separate burst safety disks screwed into opposing sides of the regulator body (review our comprehensive burst disk replacement guide: 1.8K vs 5K vs 7.5K). Each brass hex plug contains microscopic radial weep holes designed to vent air safely if internal pressure spikes dangerously:
- 1.8K Low-Pressure Disk Leaking: Located on the regulated side of the regulator body. If air hisses from the weep holes of the 1.8K plug, the internal regulator seat has failed, allowing unregulated bottle pressure to exceed 1,800 PSI. The copper burst diaphragm ruptured intentionally to prevent high-pressure air from blowing your marker's solenoid or macroline apart.
- 5K or 7.5K High-Pressure Disk Leaking: Located on the bottle side of the regulator. A 5K disk (on 3,000 PSI aluminum tanks) or 7.5K disk (on 4,500 PSI carbon-fiber tanks) monitors raw bottle pressure. If this disk vents, the tank was severely over-filled at the compressor station, exposed to intense summer direct sunlight in a hot vehicle trunk, or the copper diaphragm suffered from cyclic metal fatigue.
Zone 4: Fill Nipple & Strut Check Valve
Another common manifestation of a paintball tank regulator leak occurs after disconnecting your cylinder from the compressor fill whip, where you hear a steady hiss escaping directly out of the quick-disconnect fill nipple. Inside the nipple, a tiny urethane O-ring (#006 90D) seals against a spring-loaded brass or stainless-steel piston strut. When dirt or compressor oil contaminates this check valve, the strut cannot seat flush against the nipple base, venting bottle air into the atmosphere.
| Acoustic Leak Location | Pressure Regime | Root Cause / Physics Mechanism | Required Armorer Repair |
|---|---|---|---|
| Top Bonnet / ASA Threads | Regulated (450 – 800 PSI) | #015 bonnet O-ring shredded, flat-spotted, or under-durometer (70D Buna) | Install #015 90D cast polyurethane O-ring with light DOW 33 grease |
| Pin Valve Center (Off-Marker) | Creep Over-Pressure (800+ PSI) | Regulator piston urethane seat cut by metal burrs or dirt particulate | Disassemble bonnet; clean Belleville stack; flip or replace piston seat |
| 1.8K Burst Disk Weep Holes | Output Spike (>1,800 PSI) | Severe seat creep ruptured copper burst diaphragm to protect downstream line | Rebuild regulator piston seat FIRST; install new unified 1.8K burst disk (55 in-lbs) |
| 7.5K / 5K Burst Disk Weep Holes | Full Cylinder (3000 / 4500 PSI) | Over-filled compressor station, thermal heat expansion, or copper work hardening | Bleed tank completely; replace high-pressure disk with certified unified assembly |
| Fill Nipple Quick-Disconnect Tip | Full Cylinder (3000 / 4500 PSI) | Strut check valve #006 O-ring unseated, dirt fouled, or broken spring | Bleed bottle to 0 PSI; unscrew fill nipple; clean strut and replace #006 90D seal |
Compressed Gas Physics: Force Balance & Adiabatic Dieseling Dangers
To permanently eliminate a paintball tank regulator leak, you must understand the high-pressure pneumatic physics governing pressure vessel regulation. Inside a modern regulator—such as a Ninja Pro V2, Powerhouse Haymaker, or HK Army Aerolite—output pressure is controlled by an equilibrium equation between opposing pneumatic and mechanical forces:
HPA BENCH STANDARD
Pneumatic Output Equilibrium: Piston Force vs Belleville Preload
• Fnet: Net dynamic force on piston (equals 0 lbs at regulator shutoff equilibrium)
• Poutput: Regulated output pressure delivered to marker ASA (nominal 450 to 800 PSI)
• Apiston: Effective surface area of the regulator piston head (standard 0.148 sq in)
• kwasher: Individual spring rate of Belleville conical washers (~2,400 lbs/in per disc)
• Δx: Total mechanical deflection of the Belleville washer stack (~0.049 inches)
Test Configuration: Piston Head Area = 0.148 in² | Belleville Pre-load = 118.4 lbs
Calculated Output Result: Poutput = 118.4 lbs ÷ 0.148 in² = 800.0 PSI.
Removing two 0.010" shims drops spring preload to 66.6 lbs, establishing a low-pressure output of 450.0 PSI for high-end spool markers.
Where Poutput is the regulated gas pressure, Apiston is the surface area of the regulator piston head, and Σ(k × Δx) represents the opposing mechanical force generated by the stack of convex/concave Belleville spring washers. When gas enters the regulator from the cylinder, it flows through the center of the piston into the output chamber. As pressure rises, it acts against Apiston, overcoming the spring resistance and forcing the piston downward until the urethane seat kisses the internal sealing orifice at exactly 550 or 800 PSI.
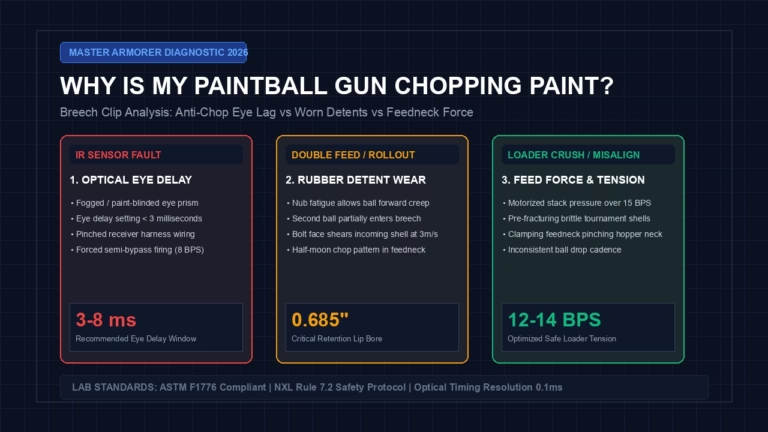
If the urethane seat has a scratch merely 0.002 inches deep, gas bypasses the seal at high pressure. Because the volume of the output chamber is tiny, this bypass rapidly equalizes output pressure with bottle pressure—resulting in dangerous downstream creep that blows burst disks, destroys inline regulator pistons (see how to service internal marker regulators in our guide to servicing paintball regulators), and causes severe paintball velocity spikes or breech chopping (read our complete breakdown on why paintball guns chop paint).
The Diesel Effect: Why Petroleum Oils Cause Catastrophic Explosions
Under no circumstances should you ever introduce petroleum-based lubricants (WD-40, Hoppe's No. 9, 3-in-One oil, or synthetic gun oil) into an HPA tank regulator or fill nipple. When a 4,500 PSI compressor line charges an empty paintball cylinder in 45 seconds, the compressed air undergoes rapid adiabatic compression. The temperature inside the regulator cavity rises according to the thermodynamic ideal gas relation:
FATAL SAFETY EQUATION
Thermodynamic Heat Generation During Rapid 4,500 PSI Tank Fills
• T1: Initial ambient temperature before fill (70°F = 529.67° Rankine)
• P1: Initial cylinder pressure (atmospheric 14.7 PSI)
• P2: Final compressor fill station pressure (4,500.0 PSI)
• γ (Gamma): Ratio of specific heats for dry compressed air (nominal 1.40)
Pressure Ratio: (4,500 / 14.7) = 306.12 | Compression Exponent = (1.4 − 1) / 1.4 = 0.2857
Calculated Temperature Output: T2 = 529.67 × (306.12)0.2857 = 1,328°R = 868°F (464°C).
Because common petroleum gun oils auto-ignite at 420°F to 480°F, any oil in the fill nipple causes instant diesel explosion. Molykote DOW 33 silicone grease remains thermally stable up to 400°F with zero combustible vapor.
If volatile hydrocarbons are present inside the fill nipple or regulator seat, this sudden temperature spike exceeds the auto-ignition temperature of petroleum oil. The compressed mixture spontaneously combusts in a fraction of a millisecond—identical to the compression stroke of a diesel engine cylinder. The resulting shock wave shatters brass burst disks, strips bonnet threads, and can cause catastrophic cylinder rupture. Always lubricate HPA regulator O-rings exclusively with 100% pure silicone grease like Molykote DOW 33 Light (compare lubricants in our guide to DOW 33 vs Slick Lube vs marker oil).
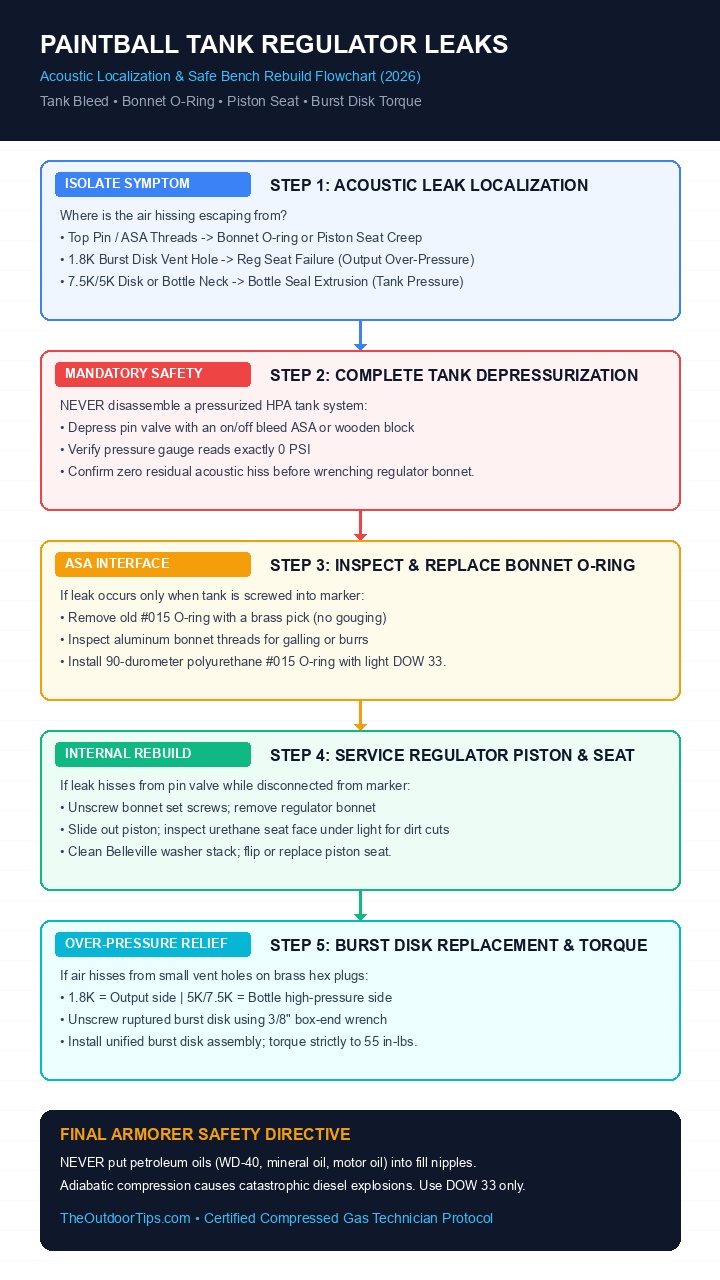
Figure 1: TheOutdoorTips 5-Phase Diagnostic Tree for acoustic leak localization, tank bleed safety, piston seat replacement, and unified burst disk torque calibration.
Step-by-Step Bench Protocol: Complete Tank Regulator Rebuild
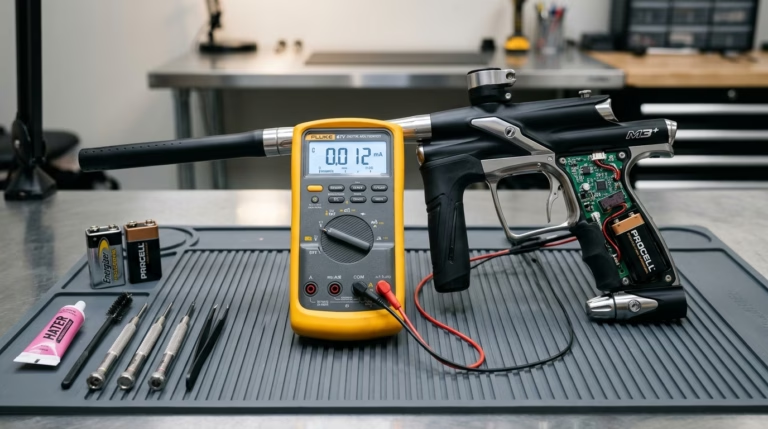
Follow this certified gunsmith protocol to safely disassemble, inspect, and rebuild a leaking paintball tank regulator. You will need a bleed tool or on/off ASA, brass O-ring picks, a 3/8" box-end wrench, hex allen keys (5/64" and 3/32"), Molykote DOW 33 grease, and fresh 90-durometer polyurethane seals.
Phase 1: Complete and Verified Tank Depressurization
MANDATORY SAFETY STEP: You must never put a wrench on a regulator bonnet, fill nipple, or burst disk while the bottle contains pressurized air.
- Screw Tank into an On/Off Bleed Tool: Attach an on/off ASA bleed adapter to the regulator bonnet threads. Engage the knob to depress the pin valve. Open the bleed purge screw slowly to vent gas to ambient air. Allow the cylinder to exhaust at a controlled rate to prevent freeze-up (dry ice formation inside the regulator).
- Verify Gauge Reads Zero: Inspect the tank's analog pressure gauge. The needle must rest solidly against the 0 PSI pin stop.
- Tactile Pin Valve Test: Using a wooden dowel or plastic tool handle (never a sharp metal punch), depress the top pin valve firmly into the bonnet. It should depress with zero resistance and produce zero acoustic hiss. If there is any resistance or hiss, continue venting until the bottle is completely dead.
Phase 2: Inspect and Replace the #015 Bonnet O-Ring
If your leak occurred exclusively when threading the cylinder into your marker's ASA, you do not need to disassemble the internal regulator:
- Remove the Old O-Ring: Using a brass or plastic O-ring pick, slide underneath the #015 seal resting in the bonnet groove. Carefully lift it over the top bonnet threads without scratching the aluminum surface.
- Clean and Inspect Threads: Wipe the bonnet threads with a lint-free microfiber cloth. Inspect the aluminum threads for galling, burrs, or metal debris transferred from dirty marker ASAs.
- Install 90D Urethane Seal: Stretch a brand-new #015 90-durometer Cast Polyurethane O-ring into the groove. Polyurethane is semi-translucent amber or clear and resists high-pressure shear. Never use soft 70-durometer black nitrile (Buna-N) O-rings on tank bonnets, as they will shred within three tank screw-ins. Apply a pinhead of DOW 33 grease to the seal surface.
Phase 3: Bonnet Disassembly & Piston Belleville Inspection
If the leak hisses out the top pin while disconnected from your marker, you must service the regulator piston and Belleville washer stack:
- Loosen Bonnet Set Screws: Locate the 2 or 3 tiny set screws around the perimeter of the regulator collar (typically requiring a 5/64" hex key). Back each screw out 2 full turns. Do not remove them completely to avoid loss.
- Unthread the Bonnet: Grasp the top bonnet firmly and unscrew it counter-clockwise from the regulator base body. If it is stubborn, use a rubber strap wrench—never use toothed channel-lock pliers directly on aluminum bonnet threads.
- Extract the Piston: Carefully pull the central regulator piston out of the body. Slide the Belleville spring washers off the piston shaft onto a clean shop towel, maintaining their exact orientation. Most regulators use alternating pairs: `()()()()` or `(())` orientation. Mixing up washer direction drastically alters output pressure.
- Inspect the Urethane Seat: Examine the bottom tip of the piston. Inside modern regulators (like Ninja or Powerhouse), a small urethane puck or coated seat seals against the brass base orifice. Under bright bench lighting, inspect the seat for circular cuts, embedded brass flakes, or pitting. If the seat is damaged, flip it over (if dual-sided) or replace the piston assembly.
- Clean and Relubricate: Wipe the piston shaft, internal cylinder bore, and Belleville washers clean of old grease and dirt. Apply a light film of Molykote DOW 33 to the piston shaft O-ring. Keep the flat sealing face of the urethane seat 100% clean and dry.
Phase 4: Burst Disk Replacement & Precise Torque Calibration
If air was venting out of the radial weep holes on your 1.8K or 7.5K burst disk hex plug:
- Remove the Spent Disk: Use a 3/8" box-end wrench (or 6-point socket) to unscrew the hex plug counter-clockwise. Never use an adjustable crescent wrench, which rounds off the soft brass flats. Discard the spent plug and internal copper disk.
- Clean Port Threads: Wipe the 3/8-24 UNF internal regulator port threads clean of copper shards and old sealant with a Q-tip. Inspect threads for cross-threading damage.
- Install Modern Unified Burst Disk: Modern burst disks feature a unified design where the copper burst diaphragm and elastomer seal are permanently swaged into the brass hex plug. Thread the new unified assembly into the port by hand to prevent cross-threading.
- Torque Strictly to 55 in-lbs: Using an inch-pound torque wrench, tighten the burst disk plug to exactly 55 inch-pounds (4.5 ft-lbs / 6.2 Nm). Over-torquing crushes the copper diaphragm prematurely, causing it to blow on your next fill. Under-torquing allows high-pressure air to leak past the outer threads.
Phase 5: Fill Nipple Check Valve Servicing
If gas leaks from the quick-disconnect fill nipple after disconnecting the fill whip:
- Remove Fill Nipple: With the tank at 0 PSI, unscrew the 1/8" NPT fill nipple using an 11/16" or 1/2" wrench.
- Extract Strut and Spring: Tip the nipple upside down. A small brass or stainless strut with a tiny #006 urethane O-ring and return spring will slide out.
- Clean and Replace #006 Seal: Wipe away dirt and compressor oil. Replace the #006 90-durometer O-ring. Inspect the spring for fatigue. Reassemble the strut into the nipple housing.
- Reinstall with Thread Sealant: Wrap 2 layers of Teflon tape clockwise around the 1/8" NPT male threads (leaving the first two threads bare to prevent tape shreds from entering the regulator), or apply a drop of Loctite 545 pneumatic thread sealant. Thread into the regulator body and snug firmly (approx. 120 in-lbs).
Compressed Gas Safety & Hydrostatic Re-Test Mandates
Under U.S. Department of Transportation (DOT-SP) regulations, Compressed Gas Association (CGA V-1) standards, and ASTM F1776 guidelines, all carbon-fiber wrapped and aluminum paintball HPA cylinders must undergo periodic hydrostatic requalification testing (every 3 to 5 years depending on bottle exemption label).
- Never fill a tank that has passed its hydrostatic expiration date stamped on the bottle label until it has been inspected and stamped by a certified DOT testing facility.
- Never remove a regulator body from a cylinder bottle yourself unless you possess certified bottle clamping vises and calibrated tank removal tools. Removing a pressurized regulator can result in lethal projectile detachment.
- Always fill HPA bottles slowly (target fill rate: 300 to 500 PSI per second) to minimize thermal shock and adiabatic heating.
Essential Bench Rebuild Tools for HPA Regulators
To service high-pressure tank regulators safely and accurately, equip your workshop bench with these specialized armorer instruments:
| Bench Instrument / Component | Technical Function | Critical Specification | Direct Armorer Links |
|---|---|---|---|
| #015 90D Polyurethane Tank O-Rings | Bonnet-to-ASA high-pressure seal preventing gas blow-by upon marker attachment | 90 Shore A Durometer Cast Urethane |
Amazon eBay |
| Molykote DOW 33 Light Synthetic Grease | Chemically non-reactive silicone lubricant with zero volatility or diesel hazard | NLGI #1 Pure Silicone Matrix |
Amazon eBay |
| Unified Burst Disk Set (1.8K & 7.5K) | Swaged brass hex assembly providing certified over-pressure relief | 3/8-24 UNF Unified One-Piece Plug |
Amazon eBay |
| Handheld Tank Output Pressure Tester | Deadhead gauge block verifying regulated output pressure and detecting seat creep | 0 – 1,500 PSI High-Resolution Dial |
Amazon eBay |
Armorer Hands-On Workshop: Tank Regulator Disassembly & Rebuild
Watch this certified compressed air technician demonstrate complete tank depressurization, bonnet set-screw removal, Belleville washer stack cleaning, and piston seat re-installation to permanently resolve a leaking regulator:
Final Armorer Verdict: Long-Term Tank Maintenance & Inspection Cadence
A quality HPA tank regulator is a precision pressure-reduction valve that demands rigorous respect. If you encounter a paintball tank regulator leak, never improvise with automotive lubricants or excessive wrench force. Depressurize the bottle completely, isolate the acoustic leak zone, replace fatigued #015 90D bonnet O-rings, rebuild gouged urethane piston seats, and torque unified burst disks to exactly 55 in-lbs. By testing your regulator output with a deadhead pressure tester every 6 months and maintaining clean, petroleum-free seals, you guarantee rock-solid 450 to 800 PSI output consistency and absolute field safety match after match.
Frequently Asked Questions: Paintball Tank Regulator Leaks
Why does my tank leak out the top pin even after installing a brand-new 1.8K burst disk?
A burst disk is a passive safety fuse; replacing the disk does not fix the root cause. If the 1.8K disk blew or air hisses from the pin valve, your regulator piston seat has failed or has dirt trapped on the sealing face. Bottle air is continuously bypassing the seat, causing output pressure to creep past 1,800 PSI. You must disassemble the bonnet, clean or replace the urethane piston seat, and re-test before the leak will stop.
Can I use standard black O-rings on my tank regulator bonnet?
No. Standard black O-rings are typically 70-durometer Buna-N (nitrile) rubber, which is too soft for tank bonnet applications. Under 800 PSI regulated pressure, 70D rubber extrudes into the microscopic clearance between the bonnet and marker ASA threads, shredding within two or three uses. Always use 90-durometer Cast Polyurethane (#015 90D) O-rings, which provide the structural hardness required to resist extrusion.
What happens if I put gun oil or WD-40 in my tank fill nipple?
Never put petroleum oil in a fill nipple. When high-pressure air fills your tank at 4,500 PSI, adiabatic compression heats the air to over 800°F in seconds. This exceeds the auto-ignition flashpoint of petroleum hydrocarbons, causing a violent internal diesel explosion that can rupture your regulator or shatter the carbon-fiber bottle, resulting in severe injury or death. Only use 100% pure silicone lubricants like DOW 33 on external O-rings.
How do I know if my tank is leaking from the regulator threads or the bottle neck?
Apply a few drops of soapy water (or leak detector solution) around the junction where the regulator threads into the aluminum or carbon-fiber bottle neck. If bubbles continuously form at the bottle seam, the 5/8-18 bottle neck O-ring (#015 or #016) has failed. Do not attempt to tighten the regulator yourself while pressurized. Bleed the cylinder to 0 PSI immediately and have a certified air technician inspect and reseal the bottle interface.
How tight should I torque a replacement burst disk?
Unified burst disks must be torqued to exactly 55 inch-pounds (4.5 ft-lbs / 6.2 Nm) using an inch-pound torque wrench and a 3/8" socket. Do not guess or tighten by hand feel. Over-torquing crushes the copper diaphragm, weakening the rupture threshold and causing premature failure during your next fill.