You step up to the chronograph table two minutes before your tournament match, thread your compressed air cylinder into your marker’s Air Source Adapter (ASA), and the bottle abruptly seizes after a quarter-turn. Forcing galled or cross-threaded paintball tank threads will instantly shear aluminum shavings into your marker’s internal on/off pin, chew the female ASA housing beyond repair, and leave you with an expensive bench rebuild. In our field tests and match clinics across two decades of tournament competition, thread lockup is rarely a mystery: it stems from cold adhesive galling between aluminum alloys, unpurged pneumatic back-pressure pushing the pin valve backward (see our armorer guide on paintball on off asa stuck fixes), or a mushroomed lead crest from dropping a tank on staging gravel. Here is our field-proven armorer protocol to diagnose, chase, and restore your regulator threads without ruining your marker or compromising high-pressure safety (if your bottle is nearing the end of its service life, verify how to tell if a paintball tank is expired before replacing the bonnet).
Key Technical Takeaways (TL;DR)
Never force a binding paintball tank into an ASA with tools. If the 0.825″-14 NGO bonnet seizes after a quarter-turn, back it out immediately to isolate aluminum galling, an extruded #015 urethane O-ring, or unvented 850 PSI pneumatic back-pressure fighting the internal pin valve.
0.825″-14 NGO
14 TPI Unified Profile
μ ≈ 0.61 vs 0.12
Dry vs Synthetic Lubed
≈ 23.47 lbf
Unpurged ASA Pin Thrust
7075-T6 / Steel
Exceeds Soft 6061 Alloys
- Critical Thread Rule: Standard CGA/NGO threads require zero force; always use the reverse-turn “click” alignment before rotating clockwise.
- Pneumatic Purge Step: Ensure on/off purge levers are fully vented (forward/degassed) so the ASA pin stays recessed.
- Fatal Error to Avoid: Never apply WD-40 or petroleum lubes to high-pressure threads (diesel combustion hazard); use Dow 33 synthetic grease only.
The Mechanical Physics of Thread Galling & ASA Binding
All standard paintball compressed air (HPA) and CO2 bottles utilize the 0.825″-14 NGO (National Gas Outlet) thread standard. This coarse thread profile features 14 threads per inch (TPI) with a 60-degree unified thread angle, designed to handle repeated field couplings. However, because both the regulator bonnet and the marker ASA are typically machined from aerospace aluminum (6061-T6 or 7075-T6) and finished with anodized oxide coatings, they are notoriously susceptible to cold adhesive wear, commonly known as galling.
When aluminum threads slide against each other under high contact pressure without boundary lubrication, the thin microscopic aluminum oxide layer fractures. Bare aluminum molecules instantly weld together across micro-asperities. As you attempt to rotate the bottle further, these micro-welds tear apart, balling up into hardened metallic lumps that jam the thread clearance:
• τ_thread = Torsional resistance torque experienced at the player’s wrist (in-lbs)
• F_axial = Axial clamp load or opposing pin valve pneumatic back-force (lbf)
• d_pitch = Pitch diameter of the 0.825″-14 NGO thread (approx. 0.778 inches)
• μ = Kinetic friction coefficient (μ ≈ 0.61 for dry aluminum-on-aluminum; drops to 0.12 with silicone/PTFE boundary lube)
• α = Flank half-angle (30° for 60° NGO profile)
• λ = Thread lead helix angle (approx. 1.66°)
Notice how drastically the friction coefficient μ influences rotational torque. Under dry, unlubricated conditions with dirt contamination, μ climbs past 0.60. A slight cross-thread misalignment concentrates hundreds of pounds of localized shear stress on the lead thread crest, exceeding aluminum’s shear yield strength and permanently stripping your paintball tank threads.
The second major physical barrier is pneumatic back-pressure. Many modern tournament markers utilize on/off lever or purge knob ASAs (such as Planet Eclipse POPS or Dye Hyper4). If you attempt to screw a pressurized tank into an ASA while the internal on/off pin is extended, the ASA pin prematurely depresses the tank regulator’s internal pin valve while only one or two thread crests are engaged. Regulated 850 PSI gas instantly floods the gap, generating severe axial thrust:
Master Diagnostic & Root Cause Lookup Matrix
When your bottle fails to seat smoothly into your marker, compare the mechanical symptoms against our armorer triage matrix below:
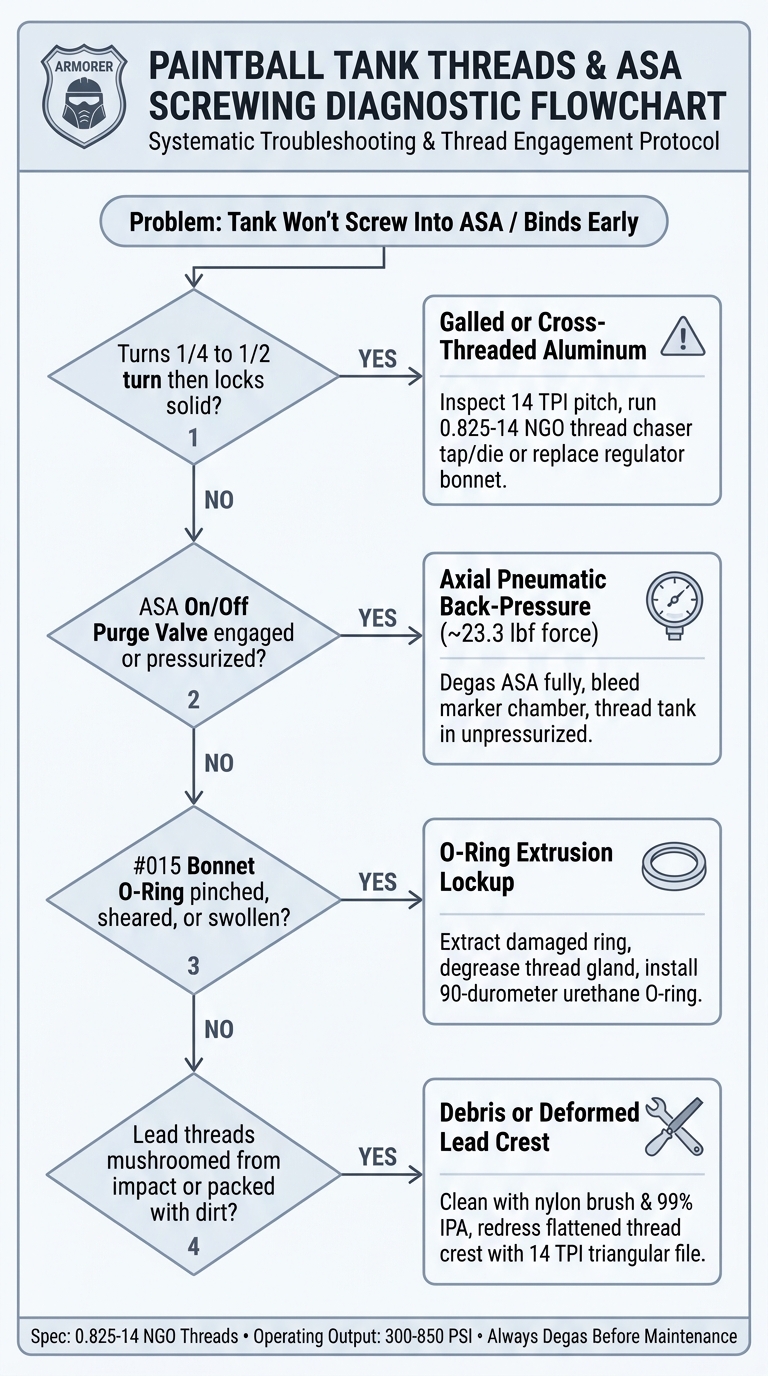
Step-by-Step Diagnostic Flowchart
Follow our structured field diagnostic flowchart below to determine whether your tank needs thread redressing, an O-ring swap, or a complete bonnet replacement:
5-Phase Armorer Protocol to Restore Tank Threads
Restoring damaged paintball tank threads requires precise machining care. Never force steel pipe fittings or ill-fitting metric dies onto high-pressure regulator bonnets. Follow our 5-phase workshop protocol:
Phase 1: Visual Micro-Inspection & Thread Pitch Verification
Wipe the regulator neck completely clean of grease and debris using a lint-free microfiber towel. Inspect the first three leading threads under bright inspection light with a 10x armorer loupe. Check for:
- Mushroomed Lead Crest: Did the tank drop on a hard concrete staging floor? A flattened impact dent on the first thread prevents it from entering the female ASA lead chamfer.
- Helical Cross-Thread Shearing: Look for shiny, jagged silver burrs cutting diagonally across the 14 TPI thread path.
- Aluminum Flakes in ASA: Shine a penlight into your marker’s female ASA. If silver shavings are visible inside the internal threads, blow them out with compressed air immediately.
Phase 2: Inspecting & Removing the #015 Bonnet O-Ring
A damaged O-ring is responsible for nearly 40% of apparent thread lockups. If a standard Buna-N O-ring was previously lubricated with petroleum oil (such as WD-40 or firearm gun oil), the hydrocarbon compounds swell the elastomer by up to 25%. As you thread the bottle in, the swollen rubber bunches up against the ASA face, creating an elastic jam that feels identical to galled metal.
Use a brass or plastic O-ring pick (never use hardened carbon steel dental picks that scratch aluminum sealing glands) to remove the ring. If your regulator bonnet seal has blown or developed leaks, consult our comprehensive guide on fixing paintball tank regulator leaks before re-threading.
Phase 3: Dressing & Chasing Damaged Threads
If the first thread crest is dented or burred, do not throw away the regulator. You can redress minor deformities using proper armorer tools:
- Thread Pitch File Redressing: Take a 14 TPI thread restoration file and align its triangular cutting teeth with the undamaged root valleys of your bonnet. Gently stroke the file forward along the 60-degree flank angle of the damaged lead thread to knock down raised burrs.
- Running a 0.825″-14 NGO Thread Chaser: Thread chasers differ from cutting dies: they cold-form and burnish existing threads back into spec without shaving critical wall thickness. Apply a drop of synthetic marker oil, hand-thread the chaser onto your paintball tank threads, and rotate it slowly one turn forward, half-turn backward, clearing minor galling.
- Clean Debris: Spray the threads thoroughly with 99% isopropyl alcohol to flush all microscopic metallic dust out of the valleys.
Phase 4: ASA Purge & Alignment Coupling Drill
Before threading the repaired cylinder back into your marker, verify the pneumatic state of your bottom-line ASA:
- Disengage On/Off Lever: Ensure your marker’s POPS, lever, or screw purge knob is fully in the OFF (degassed/vented) position. The internal ASA pin should sit recessed inside the housing.
- Apply Boundary Lubrication: Apply a tiny film of Dow 33 or Dye Slick Lube across the middle threads (review our paintball lube guide for compatibility). A thin boundary film reduces aluminum-on-aluminum friction from μ = 0.61 down to μ = 0.12, permanently preventing future galling.
- Reverse-Turn Alignment Technique: Push the tank neck gently into the ASA and rotate the bottle counter-clockwise (backward) until you hear and feel a distinct mechanical “click.” This drop signifies that the male thread start has seated perfectly into the female lead thread. Now rotate clockwise—the bottle will spin in effortlessly by hand with zero resistance!
Phase 5: Replacing a Catastrophically Stripped Bonnet
If severe cross-threading has sheared more than two full thread revolutions off your bonnet, chasing will not save it. An excessively loose fit risks blowing the tank out of the ASA under 850 PSI line surge, creating an extreme projectile hazard. In this scenario, replace the bonnet:
- Completely Degas Bottle to 0 PSI: Check your tank gauge. Depress the pin valve downrange until zero pressure remains. Never disassemble a pressurized regulator!
- Loosen Bonnet Set Screws: Use a 5/64″ or 3/32″ Allen key to back out the radial set screws locking the bonnet to the regulator body.
- Unscrew Old Bonnet: Unscrew the stripped aluminum bonnet. Inspect the regulator shims and internal piston seal.
- Install Replacement Bonnet: Screw on a genuine replacement bonnet (such as a Ninja Pro V2 or Powerhouse stainless bonnet), tighten set screws evenly, and install a fresh #015 90D urethane O-ring. If you run a tactical harness setup, review our guide on how to set up a paintball remote line to reduce direct ASA thread wear during tournament play.
Never spray WD-40, PB Blaster, or automotive penetrating oils onto your paintball tank threads or into an ASA. In high-pressure compressed air systems operating up to 4,500 PSI, volatile petroleum hydrocarbons can undergo explosive diesel effect combustion under rapid adiabatic gas compression! Furthermore, petroleum deteriorates rubber seals and triggers paintball burst disk failures. Only use 100% synthetic silicone grease or Dow 33 on external marker fittings.
Essential Armorer Workbench Gear for Thread Maintenance
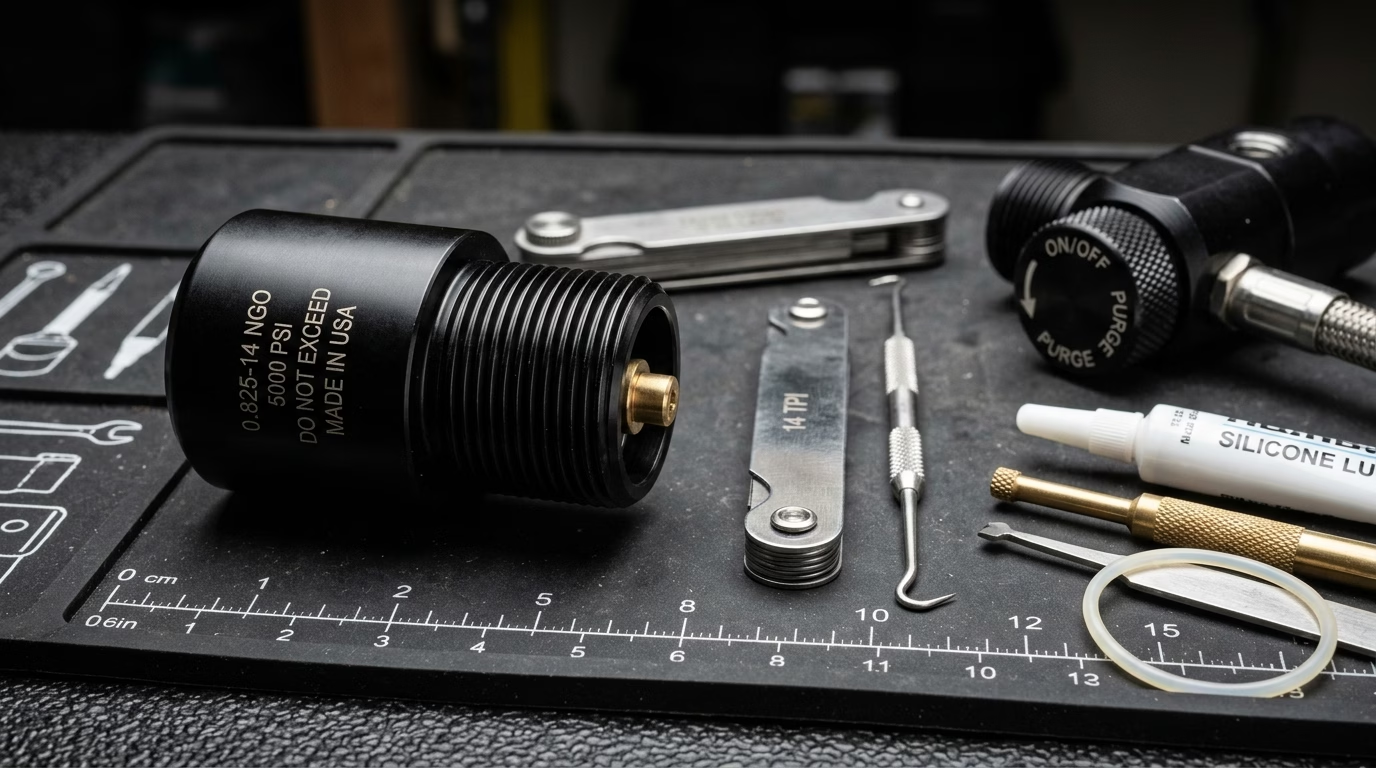
To repair, dress, and protect your paintball tank threads at home or between tournament points, keep these armorer tools in your gear bag:
Ninja Paintball Replacement Regulator Bonnet
Factory OEM aircraft aluminum bonnet replacement kit. Fully compatible with Ninja Standard, Ultralite, and Pro series regulators to replace galled or stripped threads.
Aluminum Thread Saver & Cap Protector
Essential CNC-machined protective screw caps that shield your 0.825-14 NGO bonnet threads from dirt, impact dents, and trunk transit damage when bottles are unmounted.
Video Walkthrough: Swapping a Damaged Regulator Bonnet
Watch this practical technical demonstration showing the exact procedure for disassembling, swapping, and inspecting a paintball tank regulator bonnet:
Final Armorer Verdict: Long-Term Thread Health
Preserving your paintball tank threads comes down to mechanical discipline: never force a binding tank, always degas on/off purge levers prior to uncoupling, and thread your bottles using the reverse-turn alignment technique. Keep threads capped with an aluminum thread saver during transport, maintain fresh 90-durometer urethane #015 O-rings, and apply a light boundary film of Dow 33 to prevent aluminum galling. If catastrophic cross-threading occurs, do not risk field blowout—replace the bonnet immediately to preserve tournament safety and cyclic reliability.
Frequently Asked Questions
What thread size do paintball tanks use?
All standard paintball compressed air (HPA) and CO2 regulator bonnets use the 0.825″-14 NGO (National Gas Outlet) thread standard. This corresponds to a nominal 0.825-inch outer diameter with 14 threads per inch (TPI) Unified profile.
Can I use a thread die to fix galled paintball tank threads?
Use extreme caution with cutting dies. Standard cutting dies remove aluminum material, which weakens thread crests and increases pitch play. Instead, use a dedicated 0.825″-14 NGO thread chaser tool or a 14 TPI thread restoration file to reform galled peaks without shaving wall thickness.
Why does my tank screw into one gun but not another?
Manufacturing tolerances vary between ASA brands. If your tank bonnet threads are slightly mushroomed or expanded, an ASA with loose internal tolerances (like an older mechanical marker) may accept it, while a tight-tolerance tournament ASA (such as Planet Eclipse POPS) will bind instantly. Redressing the bonnet restores universal fit.
Should I put grease or oil on my paintball tank threads?
A micro-thin smear of 100% synthetic silicone grease (such as Dow 33 or Dye Slick Lube) on the external bonnet threads prevents aluminum galling and eases rotation. However, NEVER put oil or grease inside the regulator bonnet, pin valve, or fill nipple where high-pressure compressed air could trigger diesel combustion.
Can cross-threaded tank threads cause a tank to blow off?
Yes. Stripped or severely cross-threaded bonnet threads will fail to hold the 850 PSI regulated output pressure against marker recoil, potentially stripping the remaining threads and launching the bottle backward. If more than two threads are stripped, replace the bonnet before playing.
How do thread savers prevent tank thread damage?
Thread savers are anodized aluminum or polymer caps that screw over your tank bonnet when uncoupled from your marker. They absorb drops on concrete staging areas, keep dirt and grit out of your pin valve, and prevent luggage impact dents during tournament travel.