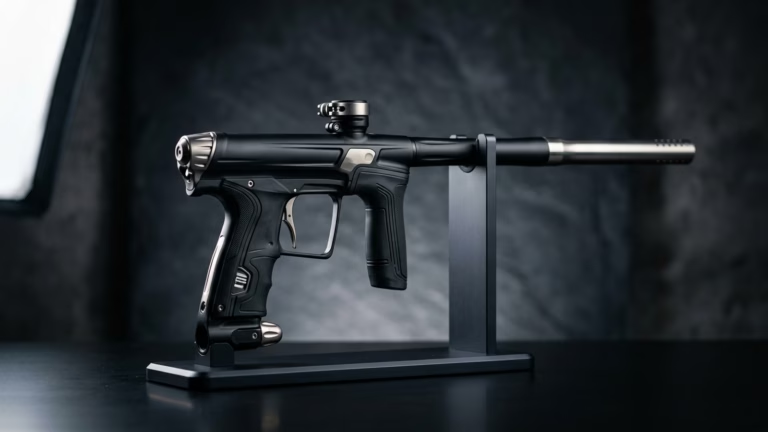
Dye Hyper3 • Hyper4 • Hyper5
Rapid Field Diagnostic: Hyper Series Operating Pressure
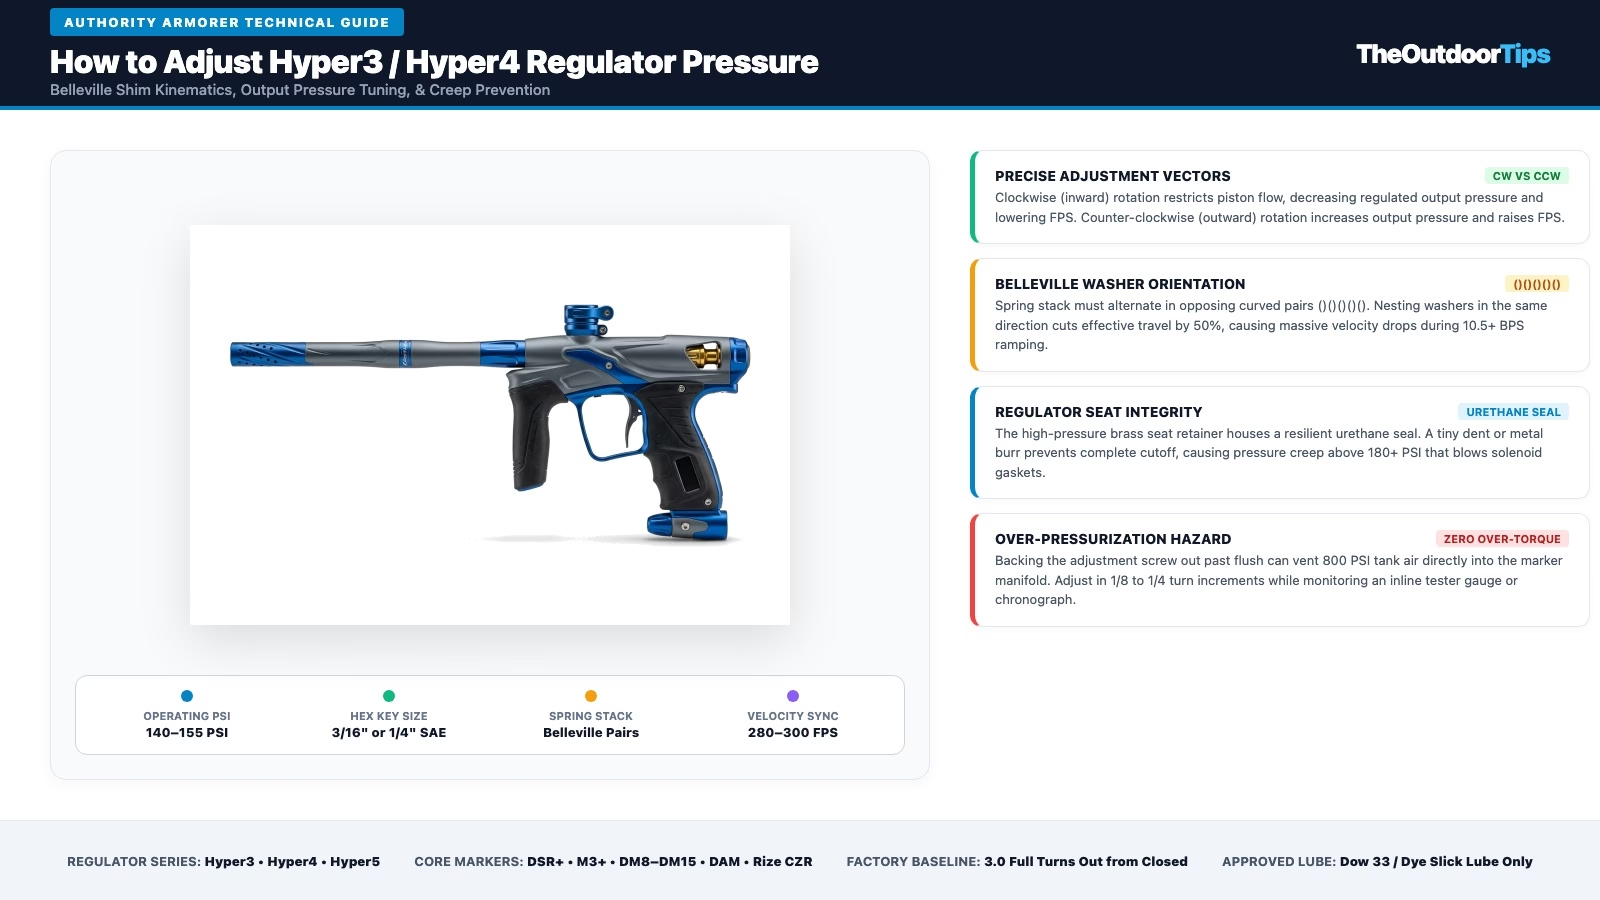
When you need to adjust dye hyper regulator pressure on Dye DM series, Matrix, DSR+, or Proto platforms, operating velocity is governed directly by spring pre-load against an internal polyurethane seat. Rotating the bottom adjustment screw clockwise (inward) compresses the Belleville washer stack against the regulator seat, choking airflow and lowering output pressure. Conversely, backing the screw counter-clockwise (outward) decompresses the stack, allowing higher flow volume and raising output pressure.
In our tournament diagnostic clinics and armorer service bays, few maintenance tasks cause more unforced pneumatic errors than improperly tuned in-line regulators. When tournament players attempt to adjust dye hyper regulator assemblies without understanding the counter-intuitive adjustment vectors of Dye’s internal Belleville stack, they frequently over-pressurize sensitive low-pressure components or crush the brass seat retainer. Unlike standard coil-spring regulators that increase velocity when turned in, Dye Hyper regulators utilize an inverted sealing geometry where inward rotation shuts down pneumatic volume.
Whether you are running a classic DM14, maintaining a modern DSR+, or eliminating erratic chronographs on a Proto Rail, this diagnostic manual details exactly how to adjust dye hyper regulator output with armorer-level precision. We examine the exact pneumatic mechanics, spring washer orientations, baseline pressure resets, and dynamic pressure testing protocols required to lock your velocity within ±3 FPS. If your marker is suffering from wild chrony swings, also review our comprehensive guide on paintball gun velocity spikes troubleshooting to isolate tank regulator output from in-line regulator drift.
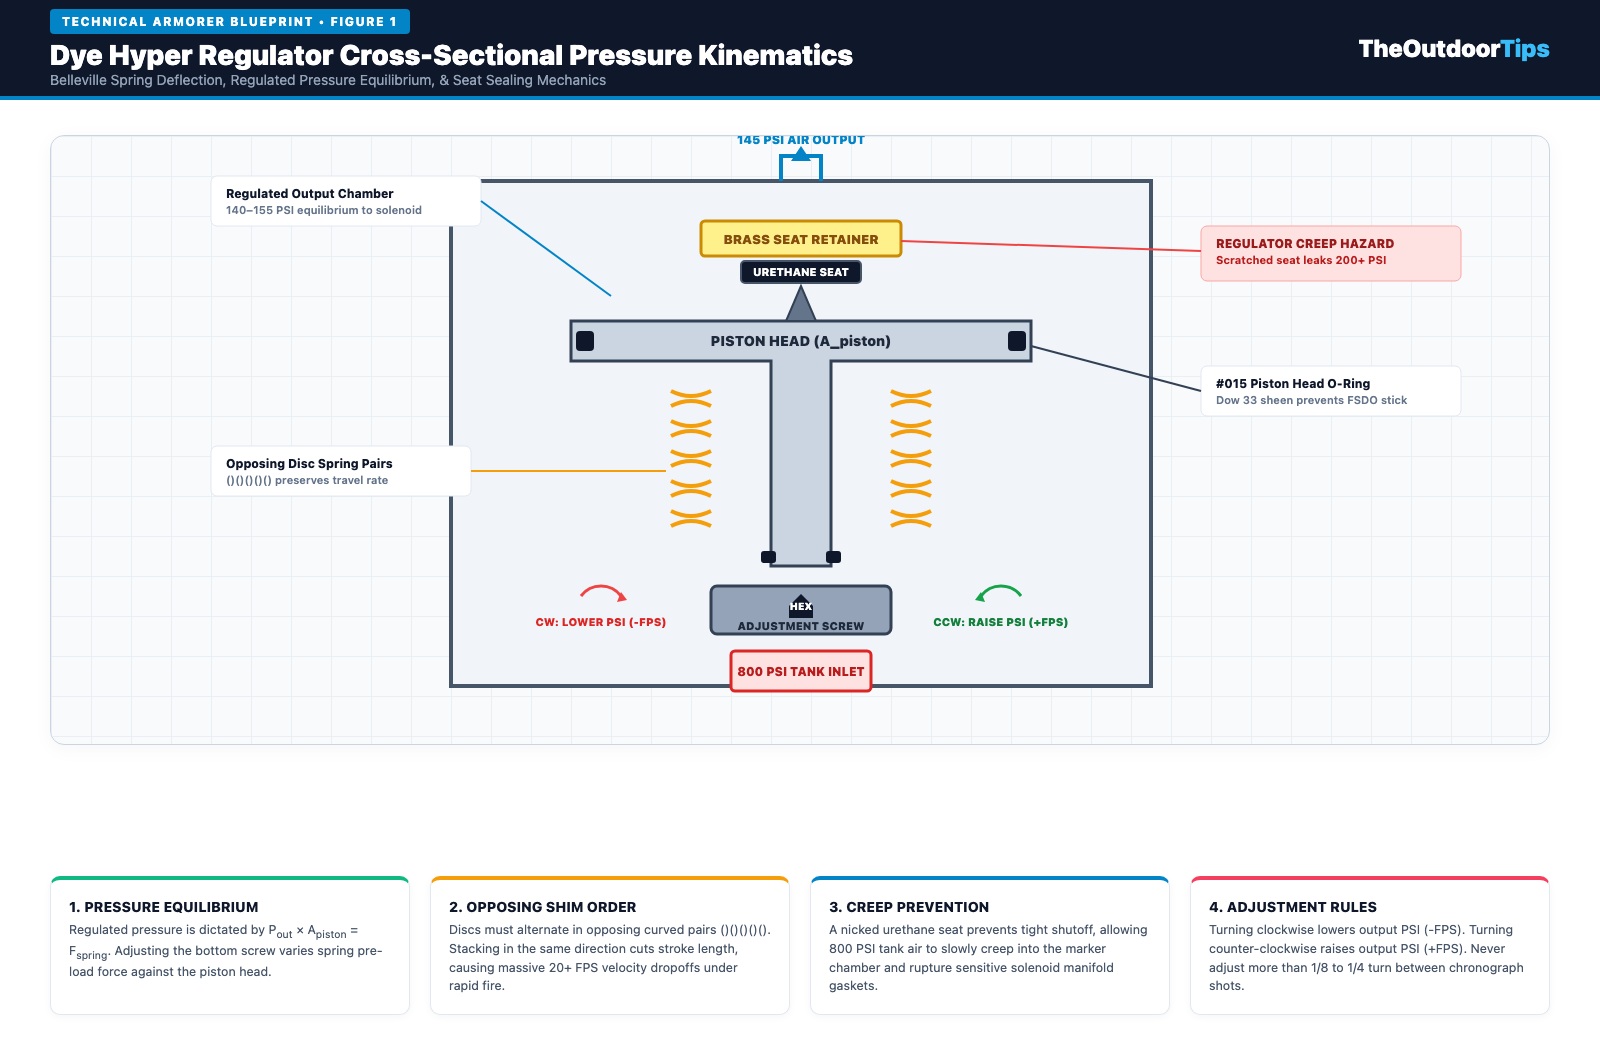
1. Pneumatic Kinematics: How Dye Hyper Regulators Regulate Pressure
To safely adjust dye hyper regulator pressure, armorers must first understand the opposing pneumatic forces governing the regulator piston. As shown in the technical blueprint above, raw high-pressure air (800 PSI from your tank regulator) enters through the bottom input ports. The internal brass seat retainer holds a precision-machined 90-durometer polyurethane regulator seat. Resting directly against this seat is the precision tip of the piston shaft.
The wide piston head is suspended inside the main regulator body by a stack of Belleville disc springs. When you turn the bottom adjustment screw clockwise, you thread the brass seat housing inward toward the piston shaft. This reduces the mechanical stroke distance required for the piston to seal against the polyurethane disc, which halts air transfer at a lower chamber pressure. Consequently, clockwise rotation lowers your output pressure (reducing ball velocity), while counter-clockwise rotation raises output pressure (increasing ball velocity).
When maintaining modern spool valve platforms like the DSR+, understanding this pneumatic relationship is critical. If output pressure rises above 170 PSI due to an over-adjusted screw or regulator creep, excessive air volume can bypass the solenoid manifold gaskets, resulting in the dreaded clicking sound where the marker refuses to cycle. For deeper diagnosis of electronic firing faults, consult our armorer protocol on paintball solenoid clicks gun won’t fire.
2. Dye Hyper Series Master Tuning & Platform Lookup Matrix
Over two decades of marker evolution, Dye has deployed multiple iterations of the Hyper regulator across its tournament lineup. The table below outlines the exact hex key dimensions, factory pressure ranges, shim configurations, and adjustment rotations required for each generation.
| Regulator Model | Primary Platforms | Adjustment Tool | Operating Output | Spring Configuration | Baseline Zero Setting |
|---|---|---|---|---|---|
| Hyper2 | DM4, DM5, PM5, PM6 | 1/4″ SAE Allen | 170 – 190 PSI | Coil Spring / Heavy Stack | Turn in soft, back out 3.5 turns |
| Hyper3 Standard | DM7–DM13, Proto Reflex | 3/16″ SAE Allen | 145 – 160 PSI | 11 Belleville Washers ()()()()()( | Turn in soft, back out 3.0 turns |
| Hyper3 45-Degree | DM14, DM15 | 3/16″ SAE Allen | 140 – 155 PSI | 11 Belleville Washers ()()()()()( | Turn in soft, back out 3.0 turns |
| Hyper4 | M2 MOSAir, Proto Rize | 3/16″ SAE Allen | 135 – 150 PSI | 12 Belleville Washers ()()()()()() | Turn in soft, back out 2.75 turns |
| Hyper5 / Inline DSR | Dye DSR, DSR+, M3+ | 3/16″ SAE Allen | 115 – 130 PSI | Linear Belleville Stack | Turn in soft, back out 2.5 turns |
When tuning tournament markers equipped with aftermarket components or performance bolts, compare your configuration with our in-depth breakdown of Dye DSR+ upgrades to balance operating chamber pressure against solenoid dwell timings.
3. Armorer Workbench: Essential Tools for Hyper Regulator Calibration
Before you attempt to adjust dye hyper regulator assemblies on your workbench, assemble the proper precision tools. Attempting to force metric Allen keys into SAE hex sockets or utilizing standard petroleum grease will permanently damage regulator components.
- SAE Ball-End Hex Wrench Set (3/16″ & 1/4″): Precision-ground chrome vanadium Allen keys prevent rounding off the internal brass adjustment screw socket.
- 0–300 PSI In-Line Regulator Tester: A dedicated ASA pressure test gauge allows you to calibrate operating pressure statically before airing up delicate marker solenoids.
- Dowel 33 / Sleek Dow33 Paintball Lubricant: 100% pure silicone grease with PTFE additives. Never use Dow 55 (which swells O-rings) or petroleum-based oils inside Hyper regulators.
- Dental Pick Set (Brass or Polymer): Essential for extracting internal #015, #012, and #007 Buna-N O-rings without gouging the mirror-polished aluminum cylinder walls.
- Lint-Free Microfiber Swabs: Cleans out metal debris, old grease, and sheared paint remnants from the regulator housing.
Proper general regulator maintenance practices are universal across all electro-pneumatic markers. If you service other platforms like Planet Eclipse SL3/SL4/SL5 regulators or Bob Long 2-liter regs, review our complete benchmark guide on how to service paintball inline regulator assemblies for side-by-side comparison.
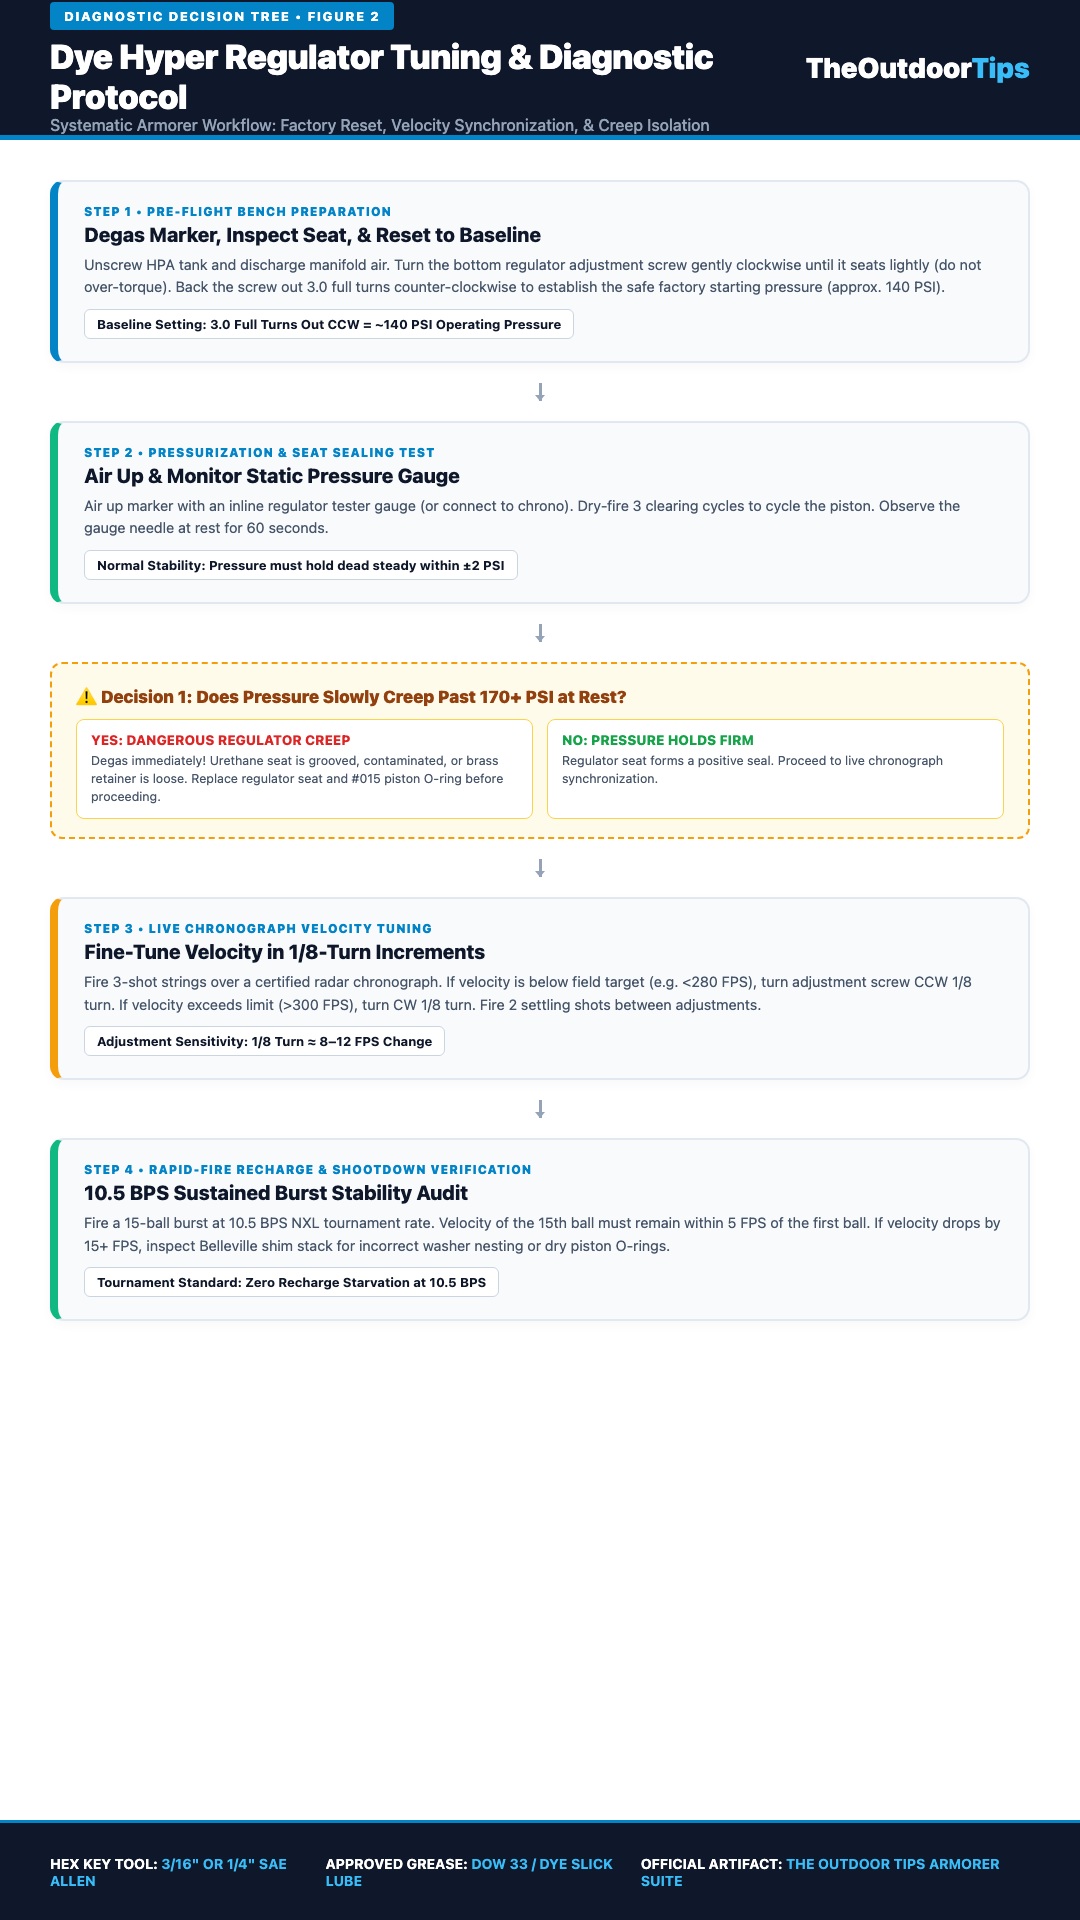
4. Step-by-Step Procedure: How to Adjust Dye Hyper Regulator Pressure Safely
Follow this rigorous five-step field protocol whenever resetting or tuning your Dye regulator. Adhering to these micro-adjustment rules prevents crushed seats and protects delicate solenoid gaskets.
Step 1: Marker Degassing & Safety Isolation
Always remove paintballs and detach your HPA tank before adjusting the regulator from a cold baseline. Turn the ASA purge knob counter-clockwise to vent trapped air from the low-pressure chamber. Dry-fire the marker in a safe direction to confirm the firing chamber has fully vented. If your tank or ASA fails to purge cleanly, follow our armorer protocol on paintball ASA won’t bleed air or learn how to safely empty a paintball tank at home before attempting maintenance.
Step 2: Establish the Factory Baseline Zero
If your regulator has been tampered with or velocity is completely out of spec, you must reset the baseline before airing up. Insert your 3/16″ SAE hex wrench into the bottom adjustment screw. Rotate the screw clockwise (inward) until you feel light, firm resistance. CAUTION: Stop immediately when resistance is felt. Never crank the screw down tightly, as this will gouge the polyurethane regulator seat. From this closed position, rotate the Allen wrench counter-clockwise 3.0 full revolutions (1080°) for Hyper3, or 2.75 revolutions for Hyper4. This places output pressure within the safe 140–150 PSI window.
Step 3: Pressurize & Acoustic Leak Inspection
Thread your high-pressure air tank into the ASA and engage the air valve. Listen closely to the regulator body:
- Leak from the bottom adjustment screw hole: Indicates a damaged or dry #007 inner piston shaft O-ring or a blown polyurethane seat.
- Leak from the side atmospheric weep hole: Indicates failure of the outer #012 or #015 piston O-ring, venting over-pressurized air safely to prevent regulator explosion.
- Total silence: Pneumatic seals are holding pressure cleanly; proceed immediately to chronograph calibration.
Step 4: Chronograph Calibration in 1/8-Turn Increments
Step up to the radar chronograph. Fire 3–4 clearing shots over the net to allow the regulator seat to take an operating set. Check the shot velocity:
- To RAISE velocity (e.g., shooting 260 FPS, targeting 290 FPS): Turn the adjustment screw counter-clockwise (outward) by 1/8 of a turn (≈45°). Fire 2 clearing shots, then measure 3 consecutive shots on the chrony. Each 1/8 turn yields an approximate 8–12 FPS gain.
- To LOWER velocity (e.g., shooting 315 FPS, tournament limit 300 FPS): Turn the adjustment screw clockwise (inward) by 1/8 of a turn. Fire 2 clearing shots to vent residual high-pressure air trapped in the plenum, then measure consecutive shots.
Step 5: High-Cadence Ramping Verification
Once semi-auto velocity is locked at 290–295 FPS, fire a continuous 10-shot burst at 10.5 balls per second. A healthy Dye Hyper regulator should maintain consistent velocity with no more than a 4–6 FPS drop-off across the string. If velocity drops by 30–50 FPS during rapid fire (“shoot-down”), the Belleville spring stack is arranged improperly or clogged with congealed grease, restricting recharge flow rate.
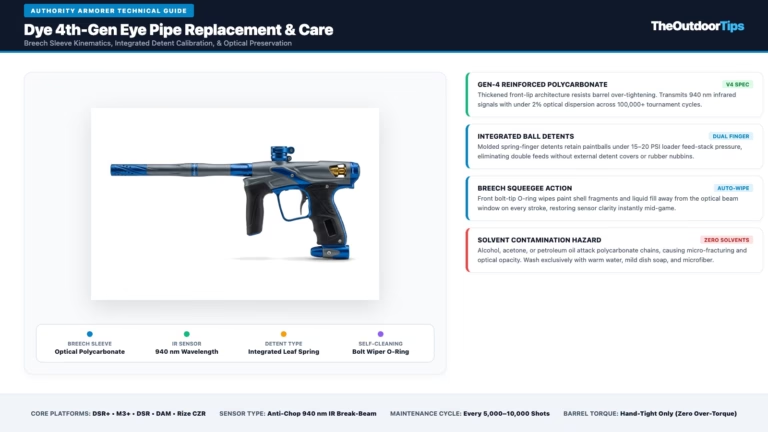
Ensuring clean paint handling and reliable feed rates is equally vital during high-speed chrony testing. If your loader is chopping or failing to keep pace with rapid fire, check our guide on paintball hopper jamming solutions and ensure your breeches are protected by reading our armorer report on Dye eye pipe replacement and maintenance.
5. Belleville Washer Stacking: The Secret to Eliminating Shoot-Down
The single most frequent armorer mistake made during rebuilds is misarranging the internal Belleville disc springs. Unlike coil springs which compress linearly, Belleville washers are conical disc springs engineered to produce massive force over micro-millimeter deflection distances. When you adjust dye hyper regulator assemblies, the spring constant (kstack) determines how rapidly the piston re-opens following a shot cycle.
In a standard Dye Hyper3 regulator, there are exactly 11 Belleville washers. In the Hyper4, there are 12 washers. They must be arranged in strictly opposing nested pairs:
( ) ( ) ( ) ( ) ( ) (
Five opposing pairs followed by one final upward cup against the piston head
( ) ( ) ( ) ( ) ( ) ( )
Six perfectly balanced opposing pairs yielding maximum travel and recharge stability
If two washers accidentally nest inside one another in the same direction — such as (( instead of () — total spring deflection stroke is reduced by 50%. The regulator will reach operating pressure at rest, but during sustained 10.5 BPS ramping strings, the piston cannot travel sufficiently far from the seat, choking recharge air volume and causing catastrophic 50+ FPS shoot-down. If you encounter mechanical cycling resistance in mechanical markers, see our guides on how to rebuild Tippmann Cyclone feed and how to rebuild Tippmann 98 valve for similar spring and valve dynamics.
6. Armorer Teardown & Bench Service Video Walkthrough
Visual inspection of the internal piston shaft and Belleville washer order is invaluable before attempting pressure adjustments. The high-definition armorer video below details the exact disassembly sequence, tool selection, and grease application for the Dye Hyper3 platform.
7. Diagnosing Regulator Pressure Creep & Seat Failure
One of the most dangerous conditions that occurs when attempting to adjust dye hyper regulator assemblies is regulator pressure creep. Creep occurs when high-pressure air slowly leaks past the seal when the marker is at rest, gradually elevating chamber pressure from 145 PSI toward 200–300+ PSI over a 15-to-30-second window.
Dye and Proto electro-pneumatic solenoids are rated for maximum operating pressures of 160–180 PSI. If regulator creep allows pressure to climb beyond 200 PSI while sitting between points, the first shot can blow the solenoid manifold gasket or rupture internal spool seals. Never leave an uncalibrated regulator pressurized without testing static seat seal integrity.
To test for pressure creep:
- Attach a 0–300 PSI test gauge to your marker’s low-pressure test port or mount the Hyper regulator onto a dedicated standalone tester.
- Air up the system and fire 5 clearing cycles to seat the piston. Note the initial static pressure reading (e.g., 145 PSI).
- Leave the assembly undisturbed for 60 seconds while watching the gauge needle closely.
- If the needle remains perfectly stationary at 145 PSI, the regulator seat is pristine. If the needle creeps upward to 160, 180, or 200+ PSI, the polyurethane seat is gouged, contaminated with dirt, or the brass seat retainer is cracked.
If pressure creep is detected, unscrew the bottom seat housing with your 1/4″ or 3/16″ hex key, inspect the polyurethane disc under a magnifying loupe, and replace the seat retainer. If your marker exhibits other pneumatic anomalies like bolt stick or short-stroking, explore our armorer troubleshooting on paintball bolt stick causes and fixes.
8. Performance Tuning: Trigger Setup, Electronics & Storage Protocols
Once you properly adjust dye hyper regulator pressure, ensuring the rest of your marker ecosystem operates harmoniously prevents electronic bounce and cycle stalls. On tournament platforms like the Planet Eclipse CS3, Geo4, or Dye M3+, a super-light microswitch trigger combined with inconsistent regulator pressure can cause runaway semi-auto firing. Review our master guide on paintball trigger bounce causes and fixes and our installation manual for how to install aftermarket trigger on Planet Eclipse to balance magnetic return tension with high-cadence cycling.
Furthermore, power delivery to your marker’s solenoid coil directly impacts consistency. A sagging 9V alkaline battery produces irregular solenoid dwell pulses that mimic regulator velocity swings. If your board power cuts during firing, consult our diagnostic protocol on paintball gun not turning on to verify circuit board capacitor health and terminal voltages.
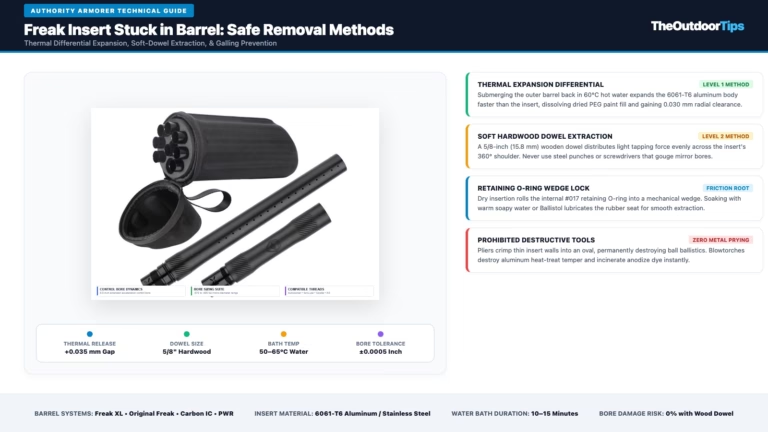
When the season ends, storing your marker with compressed Belleville springs degrades spring tension over time. Learn our armorer procedures for winterizing your gear in how to store paintball marker offseason, and verify cylinder certifications by reviewing how to tell if paintball tank is expired. If barrel maintenance issues arise during match play, our emergency field guides on how to remove stuck Freak insert and how to remove stuck paintball barrel provide non-destructive extraction procedures.
Tournament Tech Bench Standard
Final Armorer Recommendation on Dye Hyper Regulator Tuning
The Dye Hyper series remains one of the fastest recharging, most consistent in-line regulators in tournament paintball when calibrated correctly. Remember the cardinal rule whenever you adjust dye hyper regulator pressure: Clockwise is Lower (-FPS), Counter-Clockwise is Higher (+FPS). Never turn the adjustment screw in past light resistance, always maintain the strict opposing ()()()()() Belleville washer alignment, and lubricate exclusively with pure Dow 33 silicone grease.
By establishing a factory baseline zero (turn in soft, back out 3.0 turns) and tuning on the chronograph in conservative 1/8-turn increments, you protect your marker’s solenoid gaskets, eliminate first-shot drop-off, and guarantee tourney-winning ±3 FPS consistency across every match.
Frequently Asked Questions (FAQs)
Which direction increases velocity when I adjust dye hyper regulator pressure?
Turning the bottom adjustment screw counter-clockwise (outward) raises output pressure and increases shot velocity. Turning the screw clockwise (inward) lowers output pressure and decreases velocity. Always tune in small 1/8-turn increments.
What hex wrench size do I need to adjust a Dye Hyper3 or Hyper4 regulator?
The standard Dye Hyper3 and Hyper4 regulators utilize a 3/16″ SAE Allen wrench. Older Hyper2 regulators use a 1/4″ SAE wrench. Never use metric wrenches, as a 5mm metric key will strip the brass socket.
How many Belleville washers are inside a Hyper3 and how should they be arranged?
The Dye Hyper3 contains exactly 11 Belleville washers arranged in opposing pairs: ()()()()()(. The Hyper4 contains 12 washers arranged in six opposing pairs: ()()()()()(). Stacking washers in the same direction cuts spring stroke by half, causing massive velocity shoot-down during rapid firing.
Why does air leak from the side weep hole on my Dye Hyper regulator?
Air leaking from the side atmospheric weep hole indicates that the outer #012 or #015 piston O-ring has failed, is dry, or has debris pinched in the groove. The weep hole vents trapped pressure safely to prevent internal seal blowouts. Disassemble the regulator, clean the cylinder bore, and replace the piston O-rings with Dow 33 lubrication.
What is the factory baseline zero reset for a Dye Hyper3 regulator?
To reset to factory baseline zero, degas the marker, insert your 3/16″ Allen wrench, and turn clockwise until you feel light, firm resistance (do not over-tighten). From that stop point, back the screw counter-clockwise exactly 3.0 full revolutions (1080°). This sets safe initial operating pressure around 145–150 PSI.