Our interactive paintball tank regulator pressure & shim calculator matches your exact HPA bottle regulator output (300 PSI SLP to 850 PSI HP) and internal shim stack (0 to 3 shims) directly to your paintball marker’s internal HPR and solenoid operating envelope. In 2026, running an unadjusted factory 800 PSI high-pressure tank on a modern low-pressure tournament spool marker causes severe ASA pin binding, premature HPR seat wear, or blown manifold seals.
- Modern Tournament Spools (CS3 Pro, Geo R5, Luxe Aire/Idol, DSR+, Force V2): Perform best at 450–550 PSI tank output (0 or 1 shim in a Ninja Pro V2/V3 or factory 500 PSI on a Powerhouse Haymkr). Dropping from 800 PSI to 500 PSI cuts POPS/SLAP ASA engagement force by 38% and stops breech velocity creep.
- Strict Low-Pressure (LP) Only Markers (Bob Long G6R / Marq Victory): Require 300–450 PSI Max Input (0 shims or dedicated 300 PSI SLP regulator). Threading an 800 PSI tank onto a G6R will immediately blow internal frame seals and solenoid gaskets.
- Inline Blowbacks & Pneumatic Mechanicals (Tippmann A-5, TMC, Cronus, Automag): Require 750–850 PSI High Pressure (all 3 shims installed) to reliably re-cock the rear mechanical hammer and drive pneumatic Cyclone feed ratchets without short-stroking.
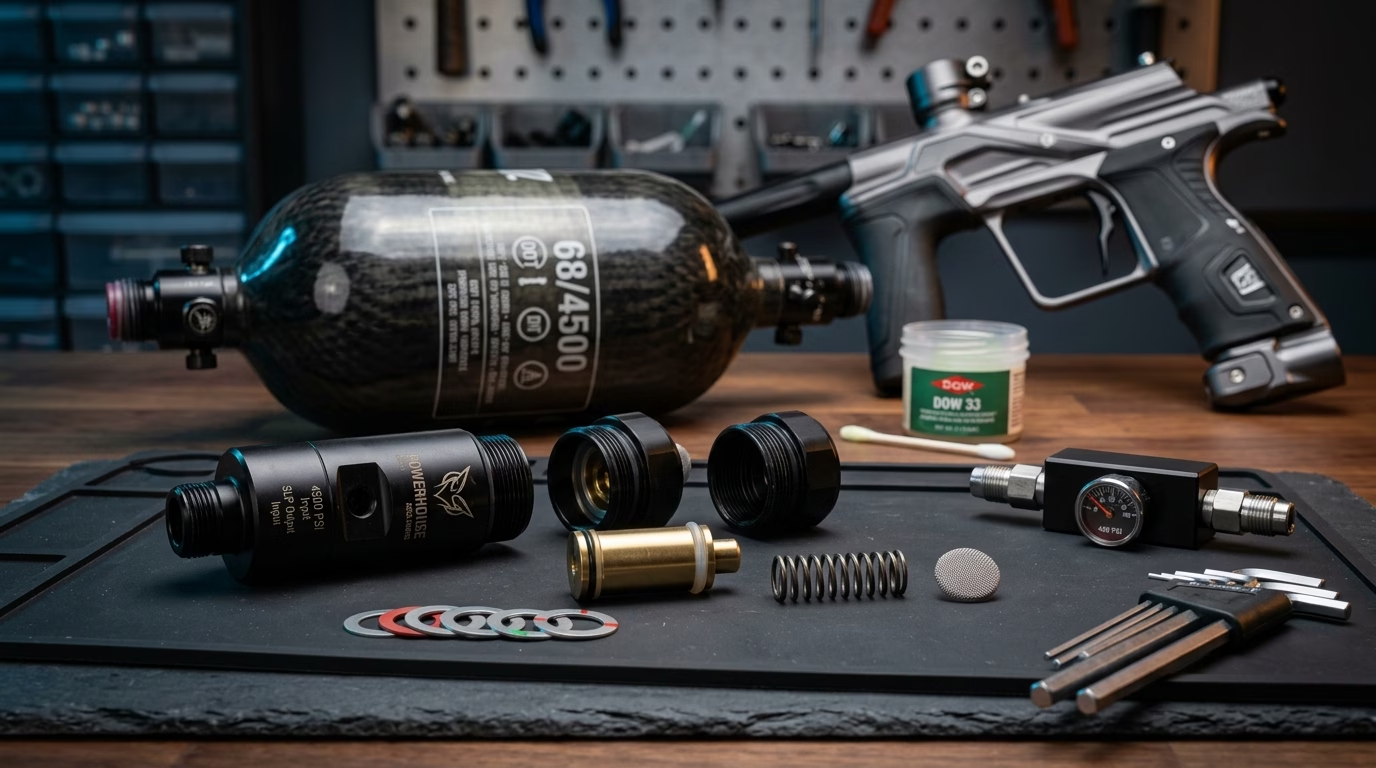
Ninja Pro V2/V3 Regulator Rebuild Kit, Inline Tank Pressure Tester & Dow 33 Lube
Paintball HPA Tank Regulator Pressure & Shim Matcher
1. Low Pressure (LP) vs. High Pressure (HP) Mechanics: Why Modern Spool Valves Demand Lower Tank Input
Every modern compressed air (HPA) paintball system operates as a two-stage pneumatic pressure reduction cascade. Your carbon fiber bottle stores compressed air at 4,500 PSI. Stage 1—your tank regulator (such as a Ninja Pro V2/V3 or Powerhouse Haymkr)—steps that raw bottle pressure down to an intermediate line pressure between 300 PSI and 850 PSI. Stage 2—your marker’s internal High Pressure Regulator (HPR) housed inside the foregrip or ASA frame—steps that tank output pressure down a second time to the marker’s actual firing valve operating pressure (95 PSI to 160 PSI on modern tournament markers).
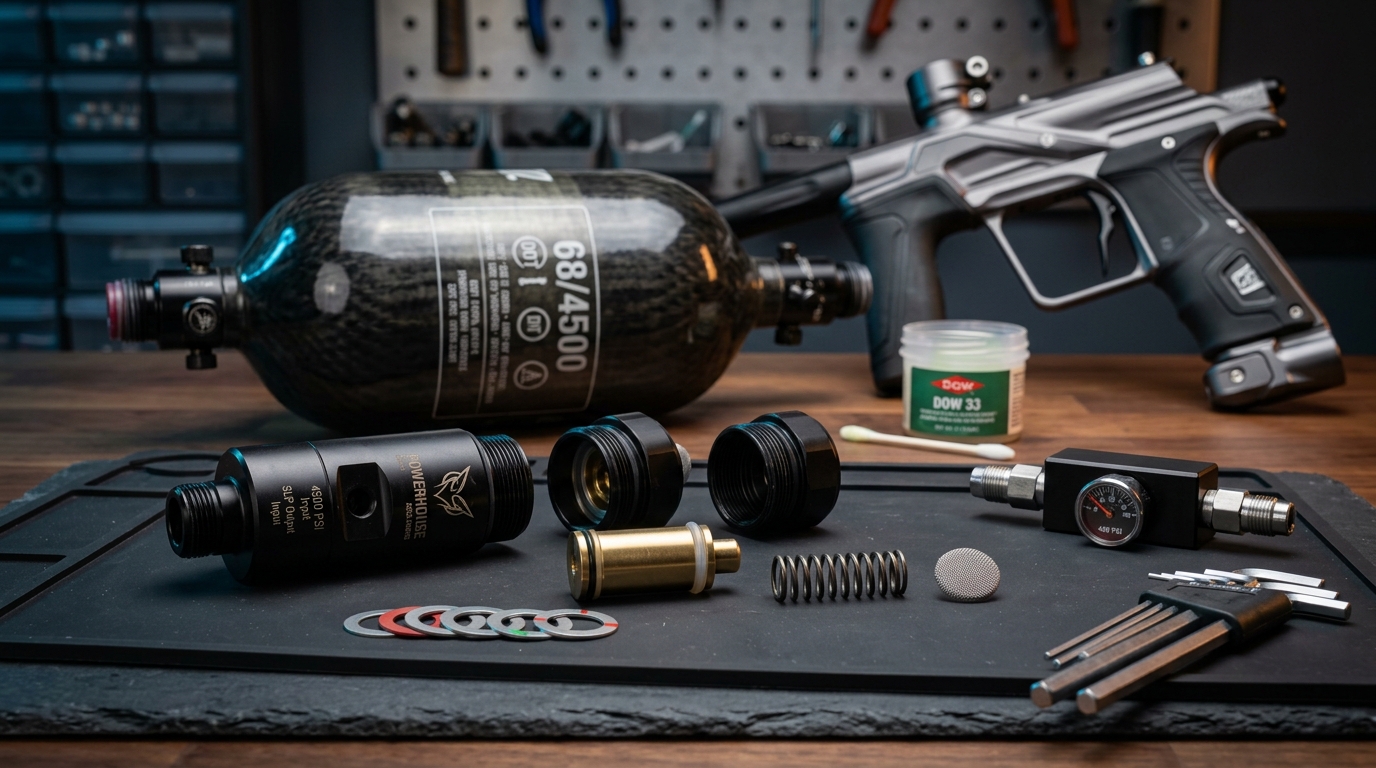
When you thread an unadjusted factory 800 PSI high-pressure tank onto a modern low-pressure spool valve marker—like the Planet Eclipse CS3 Pro (95–105 PSI OP Core), DLX Luxe Aire (110 PSI), or Dye DSR Pro (110 PSI ARC+ Engine)—three mechanical problems occur immediately:
- Excessive ASA Pin & Thread Friction (~39 lbs vs. ~22 lbs Thrust): At 800 PSI, the tank’s pin valve exerts nearly 40 pounds of axial resistance against your marker’s on/off ASA depressor cam. This causes stiff POPS/SLAP lever actuation, strips soft anodized aluminum ASA threads if unscrewed under pressure, and accelerates tank bonnet thread galling.
- HPR Piston Seat Indentation & Velocity Creep: Your marker’s internal HPR piston must slam shut against 800 PSI of incoming air after every shot at 10.5 BPS NXL ramping. Over 20,000 cycles, 800 PSI carves a deep circular groove into the marker’s internal urethane HPR regulator seat, causing first-shot velocity spikes (+15 to +25 FPS over chrono limits).
- Catastrophic Seal Rupture on LP-Only Platforms (Bob Long G6R / Victory /Force): Platforms engineered without high-pressure internal manifold tolerances—most famously the Bob Long G6R (300–450 PSI Max) and Field One Force V2 (425–525 PSI optimal)—will physically blow out frame transfer seals, pillow detents, or solenoid manifold gaskets if subjected to 800–850 PSI tank output.
2026 Master Tank-to-Marker Pressure & Shim Reference Matrix
Use this verified armorer lookup table to match your marker drivetrain against standard Ninja (3-shim) and Powerhouse (Belleville) regulator configurations:
| Marker Platform | Valve Operating PSI | Ideal Tank Output PSI | Max Safe Tank PSI | Ninja Pro V2/V3 Shims | Powerhouse Haymkr Spec |
|---|---|---|---|---|---|
| Planet Eclipse CS3 / CS3 Pro / CS2 | 95 – 105 PSI (OP Core) | 450 – 550 PSI | 800 PSI | 0 or 1 Shim (Remove 2–3) | 500 PSI Standard Spring |
| Planet Eclipse Geo R5 / Gtek 180R / Etha 3 | 115 – 135 PSI (IV / Gamma) | 450 – 550 PSI | 800 PSI | 1 Shim (Remove 2) | 500 PSI Standard Spring |
| DLX Luxe Aire / Luxe Idol / TM40 | 105 – 115 PSI (Luxe Spool) | 450 – 550 PSI | 650 PSI | 0 or 1 Shim (Remove 2–3) | 450 – 500 PSI Competition |
| Dye DSR+ / DSR Pro / Dye MXR | 110 – 120 PSI (ARC+ Spool) | 450 – 550 PSI | 750 PSI | 1 Shim (Remove 2) | 500 PSI Standard Spring |
| Field One Force / Force V2 | 140 – 150 PSI (Nucleus) | 425 – 525 PSI | 600 PSI | 0 Shims (Remove All 3) | 450 PSI Low-Mid Setup |
| Bob Long G6R / Marq Victory | 125 / 75 PSI (Dual Reg LP) | 300 – 425 PSI (LP ONLY) | 500 PSI MAX! | 0 Shims (450) or Ninja SLP (300) | 400 PSI LP Belleville Config |
| Shocker Era / AMP & MacDev GTX | 105 – 120 PSI (Spool) | 450 – 550 PSI | 650 – 700 PSI | 1 Shim (Remove 2) | 500 PSI Standard Spring |
| Empire Mini GS / Axe 2.0 | 180 – 200 PSI (Inline Poppet) | 450 – 550 PSI | 650 PSI | 0 or 1 Shim (Remove 2–3) | 500 PSI Standard Spring |
| Mechanical Autococker (WGP / Inception) | 240 – 300 PSI (3-Way / Ram) | 550 – 700 PSI | 850 PSI | 1 or 2 Shims (Remove 1–2) | 600 – 650 PSI Mid-High |
| Tippmann Cronus / TMC / A-5 / 98 Custom | 800 PSI (Direct Blowback) | 750 – 850 PSI (HP) | 950 PSI | All 3 Shims Installed | Not Recommended (Unless HP Kit) |
✅ Advantages of Tuning Tank Output to 450–550 PSI
- Effortless ASA Cam Engagement: Cuts POPS, SLAP, and Cam-Drive on/off knob effort by 35% to 45%, preventing stripped tank bonnet threads.
- Doubles Internal HPR Seat Lifespan: Lower incoming air impact velocity stops urethane HPR seat dimpling and eliminates chronograph creep.
- Protects Sensitive Solenoid Manifolds: Prevents high-pressure spikes from rupturing frame-to-body transfer gaskets on Force V2, Luxe, and G6R markers.
- Faster Mid-Game Degassing: Purges residual air in 1 shot after disengaging the ASA rather than 3 loud residual pops.
❌ Risks of Running Too Low Pressure (<400 PSI on Wrong Gun)
- Blowback Hammer Short-Stroking: Running a 450 PSI tank on a Tippmann A-5 or TMC fails to push the rear sear back far enough, causing runaway full-auto burping.
- Rapid-Fire Shoot-Down on Dirty Regs: If a 300 PSI SLP coil spring fatigues or the piston O-ring dries out, rapid 15+ BPS mechanical strings can starve the HPR.
- Cold Weather Pressure Drop: At 35°F winter woodsball scenarios, an under-shimmed 400 PSI regulator can dip toward 350 PSI during heavy firing strings.
2. Step-by-Step Armorer Teardown: How to Safely Remove Shims & Adjust Belleville Springs
Before touching a single hex screw on your HPA tank regulator, remember that a pressurized 4,500 PSI carbon fiber cylinder stores lethal pneumatic energy. Follow this exact 5-step tournament armorer teardown protocol to adjust your Ninja or Powerhouse regulator safely:
Step 1: Completely Depressurize the HPA Tank & Verify Zero Gauge Reading
Drain all compressed air from the bottle at the field air station or by dry-firing safely in a degassing tool until the tank gauge reads 0 PSI. Press the top brass pin valve or ball valve firmly with an Allen key or polymer dowel to confirm zero residual pressure remains trapped inside the bottle or regulator body. Never unscrew set screws or bonnets while air remains in the bottle.
Step 2: Loosen the Bonnet Locking Set Screws & Unthread the Bonnet
On a Ninja Pro V2/V3, use the included 3/32″ Allen wrench to back out the two opposing locking set screws on the rotational collar (or side of the standard bonnet) by 2 to 3 full turns—do not remove them completely or you risk losing the tiny internal nylon locking balls. Unscrew the top aluminum bonnet counter-clockwise by hand and lift it straight up off the regulator base.
Step 3: Extract the Brass Piston & Modify the Shim / Belleville Stack
Grip the top stem of the internal brass piston and pull it straight out of the regulator housing. Inside a Ninja Pro V2/V3 or Standard regulator, you will see the main compression coil spring and three thin red or silver metal washer shims resting around the lower piston shelf. Slide off 2 shims to reach 550 PSI (1 shim remaining), or remove all 3 shims to reach 450 PSI. On a Powerhouse Haymkr, note the alternating concave/convex orientation ()()() of the Belleville disc washers before removing or flipping a washer pair.
Step 4: Clean the Piston Bore & Apply Fresh Dow 33 Light Lubricant
Wipe old grey metallic grease from the brass piston O-rings and the internal aluminum cylinder bore using a lint-free microfiber cloth. Inspect the tiny white or clear urethane piston face seat at the bottom of the piston for metal shavings or deep ring grooves. Apply a thin, translucent film of Dow 33 Light (or Monkey Poo / Hater Sauce) solely to the urethane O-rings on the piston. WARNING: Never get grease or oil near the external 4,500 PSI fill nipple!
Step 5: Reassemble the Bonnet & Verify Output on an Inline Pressure Tester
Insert the shimmed piston and spring assembly back into the regulator body, thread the aluminum bonnet down until hand-tight, and snug the two 3/32″ set screws gently against the rotational groove. Fill the tank to at least 1,500 PSI and screw a 0–1,500 PSI inline regulator tester gauge onto the bonnet threads. Fire 3 quick bursts via the tester bleed valve and verify that the needle settles cleanly at your target pressure (450–550 PSI) with zero upward needle creep.
3. Troubleshooting Tank Output Spikes: Diagnosing Regulator Creep & Damaged PEEK / Urethane Seats
Even if you configure the exact number of shims recommended by our calculator, a worn tank regulator can still destroy your marker’s internal seals through a failure mode known as Regulator Creep. Here is how to diagnose and cure the three most common HPA tank regulator failures on the armorer bench:
⚠️ Symptom 1: Regulator Creep (Output Spikes From 500 PSI to 950+ PSI Between Points)
The Mechanical Cause: While you are shooting rapidly at 10.5 BPS, your regulator dynamically holds 500 PSI. However, when you stop shooting and stand in the pit for 3 minutes, high-pressure 4,500 PSI bottle air slowly leaks past a scratched or indented bottom piston urethane/PEEK seat. Within 60 seconds, the pressure trapped between your tank pin and your marker’s HPR climbs past 900 PSI—locking up your ASA, venting through your marker’s solenoid, or dropping your first shot velocity to 210 FPS (First Shot Drop Off / FSDO).
The Armorer Fix: Disassemble the regulator and replace the brass piston or flip/replace the bottom urethane regulator seat disc using a $14.95 Ninja Rebuild Kit. Removing shims will not stop regulator creep because creep is a seal leak, not a spring tension setting.
🔍 Symptom 2: Rapid-Fire Shoot-Down (Velocity Drops 30 FPS Mid-Stream)
The Mechanical Cause: Your marker chronographs at 285 FPS on single shots, but the 6th through 12th balls in a ramping string drop into the dirt at 245 FPS. This happens when a swollen upper piston O-ring or dry Belleville spring stack restricts the regulator’s recharge rate, or when a 300 PSI SLP regulator is paired with a high-volume marker shooting 15+ BPS in cold weather.
The Armorer Fix: Replace the #015 / #016 urethane piston O-ring, clean the air transfer ports in the piston stem, re-lubricate with Dow 33 Light, and ensure your tank output is at least 150–250 PSI higher than your marker’s internal HPR operating pressure so the HPR has sufficient pressure differential (headroom) to recharge instantaneously.
🛠️ Symptom 3: Top Ball Valve / Pin Valve Leaking When Disconnected From Marker
The Mechanical Cause: Micro-debris from dirty field fill whip compressors embeds into the top pin O-ring (#008 urethane on Ninja ball/pin valves). Depressurize the bottle, unscrew the bonnet, push the top ball/pin retainer out from the underside of the bonnet, swap the 90-durometer white urethane #008 O-ring, and reassemble.
4. Recommended Armorer Bench Parts: Rebuild Kits, Pressure Testers & Dow 33 Lubricants
Every competitive speedball player and weekend woodsball armorer should keep a dedicated tank maintenance kit in their gear bag. Before threading a freshly shimmed regulator onto a $1,795 flagship marker, verify its exact output pressure and recharge recovery speed using these field-tested tools:
Ninja Pro V2/V3 Rebuild Kit & Inline Pressure Tester Gauge
Includes replacement brass piston with factory urethane seat, spare red pressure shims, 90-durometer urethane O-rings, and screw-on 0–1,500 PSI ASA test gauge with bleed button to spot regulator creep instantly.
Dow 33 Light Armorer Grease (Exalt / Planet Eclipse / Captain O-Ring)
100% pure silicone-based Dow Corning 33 Light grease engineered for high-cycle pneumatic tank regulator pistons, Belleville spring stacks, and tournament spool valve bolt engines (CS3, Luxe, DSR+).
🔗 Related Paintball Engineering Calculators & Marker Silo Guides
- Rate of Fire & Dwell Timing: Dial in your solenoid millisecond dwell and tournament ROF cap with our Paintball BPS & ROF Calculator (2026): Tournament Legality & Debounce Checker.
- Weekend Paint & Air Budgeting: Calculate how many 68/4500 tank fills and cases your squad will burn using our Paintball Paint Cost Calculator: Weekend Ammo & Field Expense Planner.
- Flagship Tournament Marker Testing: Compare internal HPR and spool valve efficiency in our Planet Eclipse CS3 Pro vs. Dye MXR Showdown, Field One Force V2 Review, and Best Paintball Guns Under $400 (2026).
5. Frequently Asked Questions (Armorer Tank Regulator & Shim FAQ)
1. How many shims should I remove from a Ninja regulator for a Planet Eclipse CS3, Geo R5, or Etha 3?
Remove 2 red/silver shims (leaving 1 shim installed for ~550 PSI) or remove all 3 shims (0 shims installed for ~450 PSI). Planet Eclipse explicitly recommends a 450 to 550 PSI tank output pressure across the CS3, CS3 Pro, Geo R5, Gtek 180R, and Etha 3/3M lineup to minimize POPS ASA pin friction and extend internal HPR regulator seat longevity.
2. Can I use a 300 PSI Super Low Pressure (SLP) regulator on a Dye DSR+, Luxe Aire, or Planet Eclipse CS3?
While a 300 PSI SLP regulator will cycle a CS3 or DSR+ on slow single shots because their internal valves operate at 95–115 PSI, 450–550 PSI is strongly preferred over 300 PSI SLP for tournament speedball. Running 450–550 PSI gives your marker’s internal HPR a healthy ~350 PSI pressure differential so it can recharge instantaneously during 10.5 BPS ramping strings, even as your carbon bottle drops below 800 PSI late in a long point.
3. What happens if I put an 800 PSI high-pressure tank on a Bob Long G6R or Marq Victory?
Threading an 800 PSI high-pressure tank onto a Bob Long / Field One G6R or Marq Victory will blow out the internal low-pressure regulator (LPR/HPR) transfer seals, pillow detents, or solenoid manifold gasket. The G6R is strictly engineered for Low Pressure (LP / SLP) tank input between 300 PSI and 450 PSI max (never exceed 500 PSI). Always remove all 3 shims from your Ninja regulator or run a dedicated 300 PSI SLP spring stack on Bob Long markers.
4. Why is my Tippmann A-5 or Cronus burping or firing full-auto when I switch to a carbon fiber HPA tank?
Your carbon fiber tank regulator has likely been shimmed down to 450 or 550 PSI for a tournament marker. Mechanical inline blowbacks like the Tippmann A-5, X7, TMC, Cronus, and 98 Custom do not have an internal HPR and rely on raw 750 to 850 PSI High Pressure (HP) tank output to slam the rear hammer back over the sear catch and cycle the pneumatic Cyclone Feed piston. Reinstall all 3 shims in your tank regulator to restore 800 PSI output.
5. Why should you NEVER put oil or grease in a paintball HPA tank fill nipple?
Only apply Dow 33 Light silicone grease to the internal low-pressure regulator piston O-rings inside the bonnet. Never put petroleum oil, gun oil, or grease inside the external 4,500 PSI fill nipple. When 4,500 PSI compressed air rushes into a fill nipple containing hydrocarbon oil, adiabatic compression heats the air past the auto-ignition flashpoint (diesel effect), which can cause a catastrophic high-pressure explosion.