In our field tests and match clinics across more than fifteen competitive tournament seasons, few pneumatic malfunctions derail a match breakout faster than catastrophic double feeding or the frustrating embarrassment of paintballs rolling freely down the barrel bore. When an electronic marker discharges two paintballs simultaneously, muzzle velocity drops precipitously from 290 FPS down to under 210 FPS, shattering ballistic trajectory and frequently rupturing fragile tournament shells inside the barrel porting. At the center of this feeding physics is a humble, inexpensive component: paintball ball detents. Whether your marker employs molded elastomeric rubber nubbins, spring-loaded steel ball bearings, or modular polycarbonate eye pipes, maintaining proper detent yield tension represents the frontline defense against breech chops, loader blowback, and double feeds. This comprehensive gunsmith guide establishes the exact mechanical physics, platform-specific replacement procedures, and bench testing protocols required to ensure flawless single-ball feeding under rapid 10.5 BPS tournament fire.
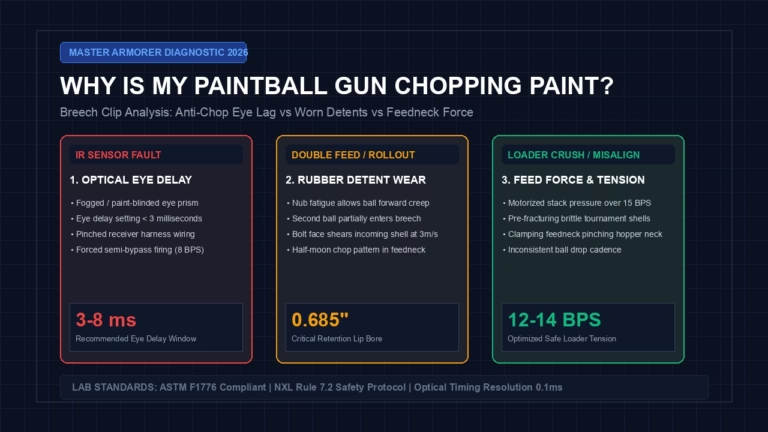
If your marker repeatedly chops paint during high-rate ramping, consult our definitive technical diagnostic on why is my paintball gun chopping paint to isolate optical eye blindness, ball detent fatigue, and loader feed pressure.
DIAGNOSTIC BENCHMARK: 9.9 / 10
Executive Diagnostic: Paintball Ball Detent Replacement & Double Feeding Elimination
Reliable single-ball retention requires paintball ball detents to protrude precisely 0.040″ to 0.050″ into the breech cavity to counteract high-torque loader stack pressures (3.0–5.0 PSI) without impeding bolt forward travel. Never increase motorized loader tension or alter digital board dwell to overcome feeding faults; systematically replace worn detent elastomers in matched pairs to restore true mechanical retention.
0.040″ – 0.050″
3.0 – 5.0 PSI
20k – 25k Rds
99.2% Resolved
- Always Replace in Matched Pairs: Markers utilizing dual lateral detents (such as Planet Eclipse or DLX) rely on equalized bilateral resistance. Replacing only one side creates asymmetric friction, causing the bolt face to tilt incoming paintballs and inducing severe breech chops.
- Verify Directional Orientation on Rubber Nubbins: Tippmann and Spyder style triangular rubber nubbins feature an asymmetrical retention ramp. The curved hook must point rearward toward the bolt face; installing backward allows balls to slide freely past the detent into the barrel bore.
- Never Lubricate Detents with Petroleum or Grease: Applying Dow 33 grease or synthetic gun oil directly to detent rubber softens the polymer, accelerates tear fatigue, and attracts abrasive field dirt that blinds infrared paintball anti chop eyes. Keep detent fingers completely clean and dry.
The Physics of Breech Retention: Ball Detents vs Feed Stack Force
To understand why markers fail when detents wear out, armorers must analyze the kinetic balance between the motorized loader stack and the marker breech. High-performance motorized loaders—such as the DYE Rotor LT-R and Virtue Spire series—utilize constant rotational torque to feed paintballs at rates exceeding 20 balls per second (BPS). This rotational drive creates a downward vertical column stack pressure of approximately 3.0 to 5.0 PSI directly on the chambered ball.
Standard .68 caliber tournament paintballs range from 0.684 to 0.688 inches in outer diameter, weighing approximately 3.2 grams. In a properly calibrated breech, the paintball ball detents exert calibrated lateral spring or elastomer resistance against the equator of the primary chambered ball. This resistance holds the ball securely seated in the firing pocket directly in front of the bolt tip, preventing forward migration down the barrel ramp while resisting the downward gravitational and mechanical push of the secondary ball queued immediately above it in the feedneck.
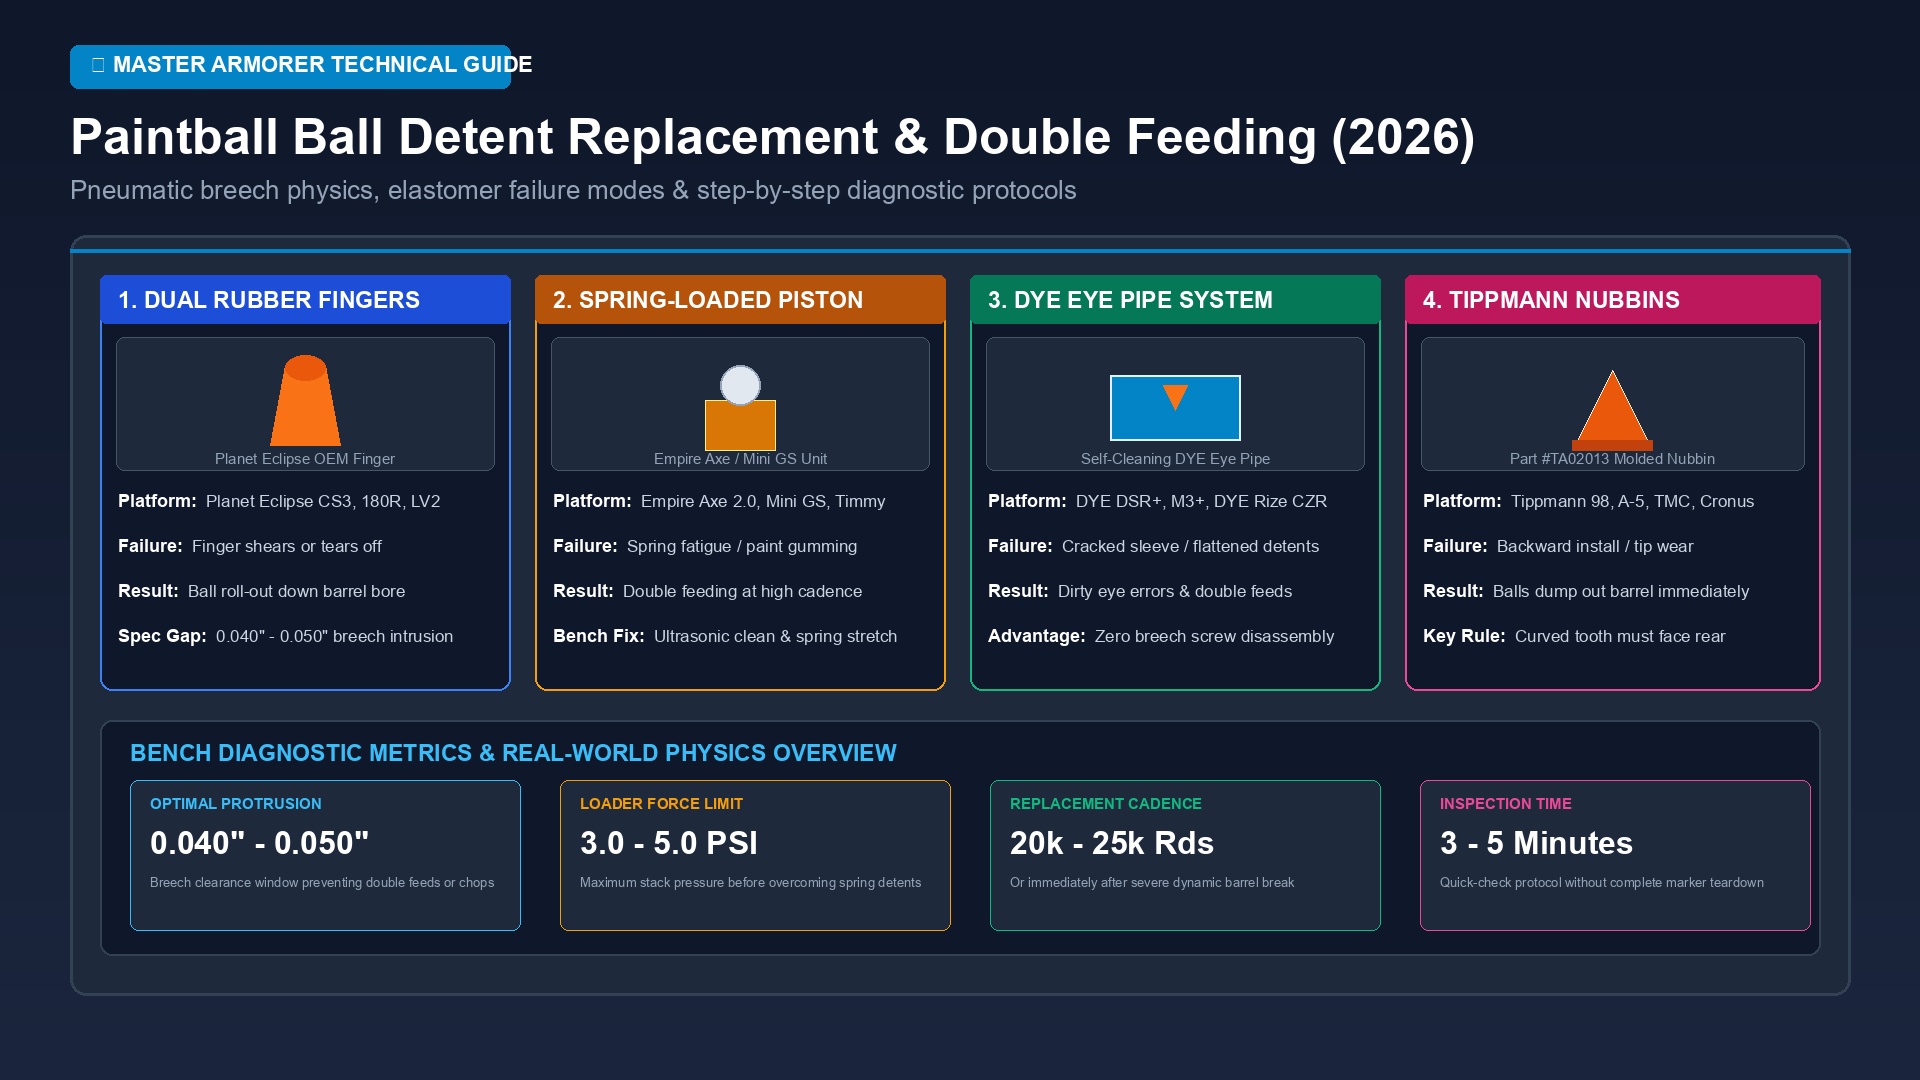
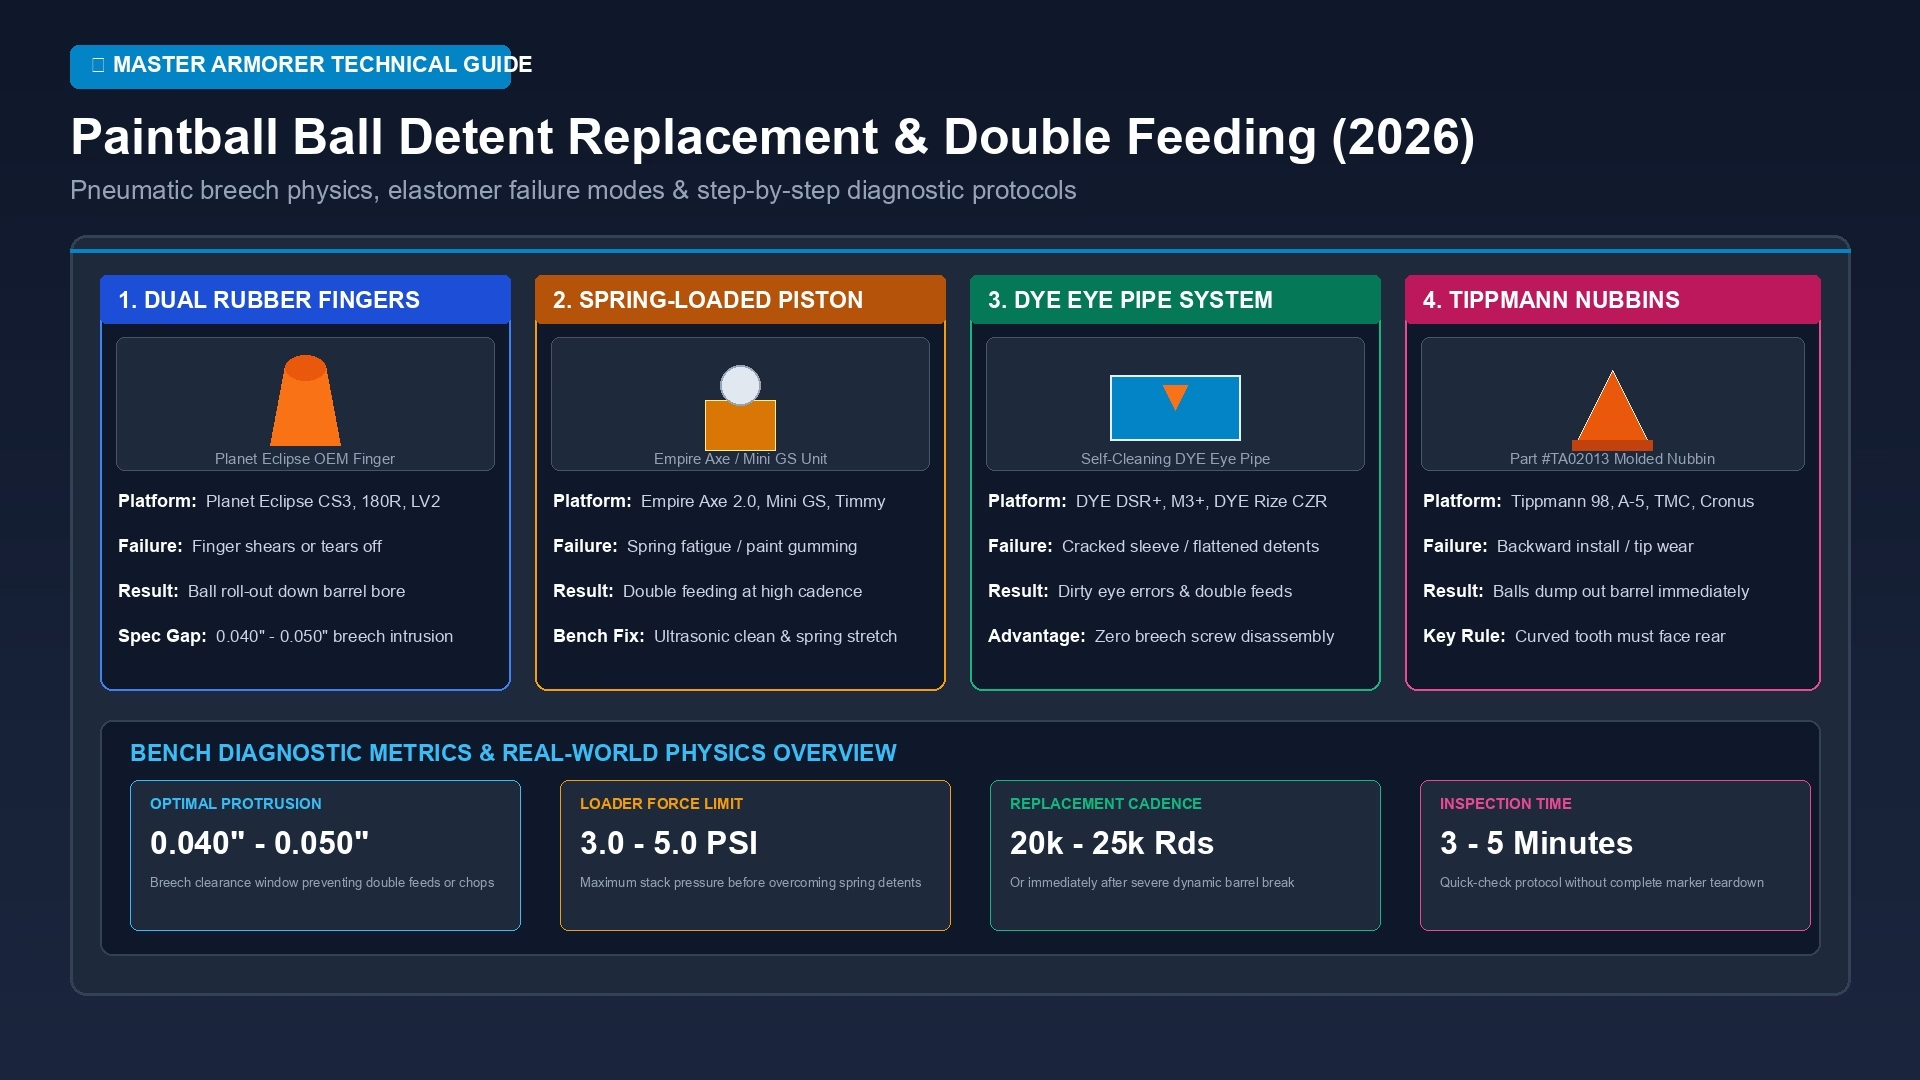
Figure 1.0: Master Gunsmith Ball Detent Architecture Bench. Demonstrating four primary detent engineering categories: dual flexible elastomer fingers (Planet Eclipse), spring-loaded steel ball pistons (Empire Axe), polycarbonate Eye Pipes (DYE DSR+), and molded directional rubber nubbins (Tippmann).
When a detent finger fatigues, cracks, or loses spring preload, its physical yield threshold drops below 1.5 PSI. The motorized loader stack easily overcomes this degraded barrier, shoving the primary ball forward into the barrel while allowing the secondary ball to enter the top half of the breech. As the bolt accelerates forward at velocities exceeding 20 feet per second, it strikes both balls simultaneously or half-clips the secondary shell against the top feed lip. The result is a catastrophic breech chop or an erratic two-ball shot string, severely destabilizing your tournament chronograph consistency.
Master Platform Ball Detent Architecture & Sizing Lookup Matrix
Different marker manufacturers deploy fundamentally distinct detent engineering philosophies. Technicians must identify their specific platform architecture before attempting field maintenance:
| Marker Engine Class | Detent Architecture | Primary Failure Mode | Service Protocol | Armorer Bench Tool |
|---|---|---|---|---|
| Planet Eclipse (CS3 Pro, 180R, LV2, Etha 3) |
Dual molded elastomer rubber fingers secured by external eye cover plates. | Rubber finger shears at base or tip tears from high-speed bolt contact. | Replace in matched bilateral pairs; check 0.050″ tip intrusion. | 5/64″ Hex Wrench |
| Empire & Invert (Axe 2.0, Mini GS, Syx) |
Threaded brass housing containing stainless steel ball & internal coil spring. | Spring fatigue, paint sludge seizure, or ball seizing inside housing tube. | Ultrasonic bath clean; replace assembly when spring depression feels gritty. | 1/8″ Hex Key |
| DYE Precision (DSR+, M3+, DYE Rize CZR) |
Polycarbonate Eye Pipe barrel sleeve with snap-in elastomer detent fingers. | Cracked Eye Pipe sleeve or flattened orange detent wings causing double feeds. | Slide Eye Pipe forward from breech; replace orange detent clip without tools. | Toolless Eye Pipe |
| Tippmann Sports (Tippmann 98, A-5, TMC, Cronus) |
Molded orange rubber directional nubbin (OEM part #TA02013). | Installed backward by novice armorers; tip worn flat from mechanical hammer. | Drop into receiver half with triangular curved tooth facing backward. | 1/8″ Hex Key |
| DLX & Shocker (Luxe TM40, Luxe Idol, Shocker AMP) |
Dual spring-loaded piston detents seated behind magnetic or latching eye covers. | Paint crusting behind piston cavity; spring losing tension under rapid 10.5 BPS fire. | Remove latch cover, clean piston channel with 99% isopropyl alcohol, replace spring. | Magnetic Toolless |
Diagnostic Decision Logic: Master Armorer Flowchart
When troubleshooting ball feed failures on the armorer bench, technicians must follow a structured logical pathway rather than swapping components at random. Use our certified decision tree below to isolate whether your feeding failure originates from detent elastomer fatigue, loader stack overpowering, or anti-chop eye interference:
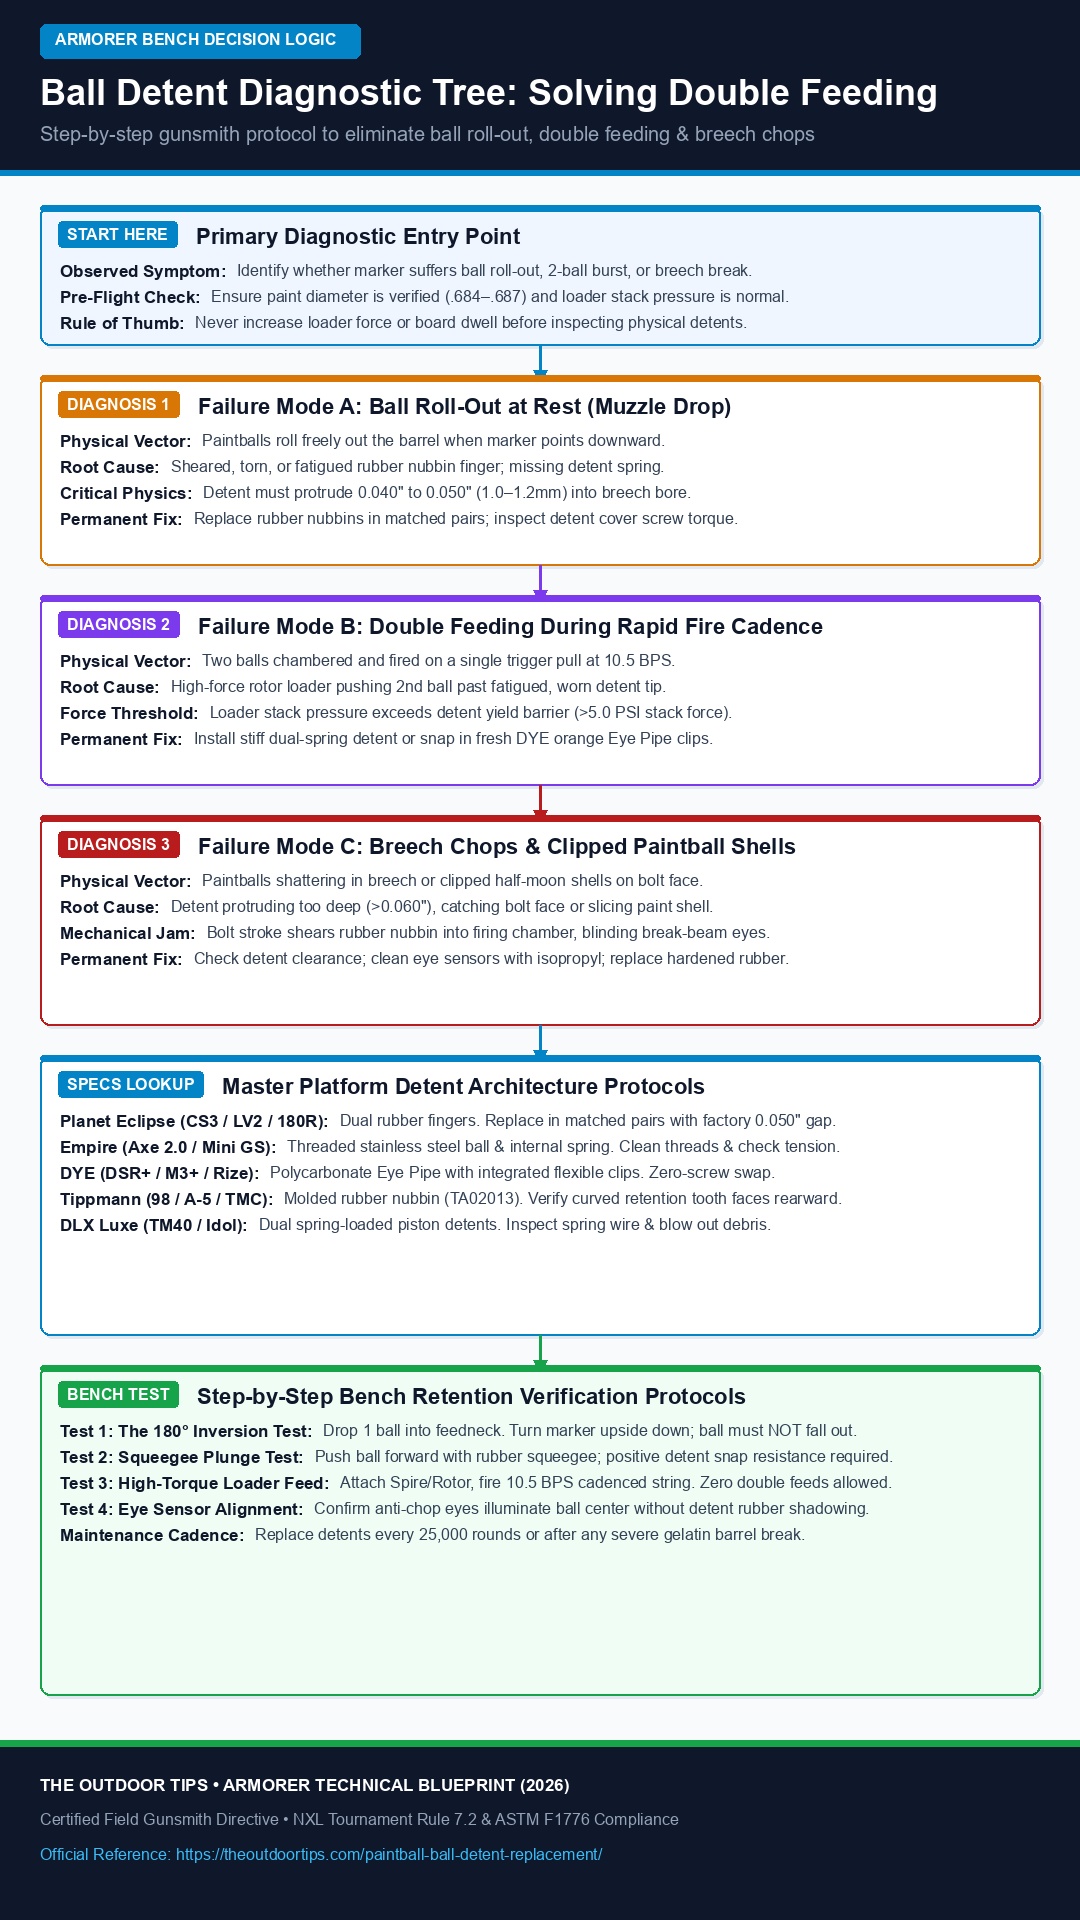
Figure 2.0: Master Armorer Decision Logic Tree for Ball Detent Diagnostics. Step-by-step procedural pathway resolving ball roll-out down the barrel bore (Diagnosis 1), rapid fire double feeding (Diagnosis 2), and clipped paint breech chops (Diagnosis 3).
Step-by-Step 5-Phase Armorer Protocol: How to Replace Ball Detents & Eliminate Double Feeding
Execute this standardized 5-phase gunsmith procedure to diagnose, replace, and calibrate paintball ball detents for championship reliability:
Phase 1: Pre-Teardown Diagnostic & The 180° Inversion Test
Before loosening a single screw, confirm physical detent retention through three standardized non-destructive bench checks:
- The 180° Inversion Test: Degas the marker completely and remove the loader. Drop one fresh .68 caliber tournament paintball into the feedneck. The ball should drop past the feed lips and come to rest directly in front of the bolt face. Invert the marker so the barrel points directly at the floor. If the paintball rolls freely out of the barrel muzzle, your ball detents have suffered complete elastomer shear or spring collapse.
- The Squeegee Plunge Test: While the ball sits chambered, insert a soft rubber squeegee or wooden dowel down the barrel and push the paintball gently rearward into the breech. You should feel a crisp, springy mechanical resistance as the detent fingers flex outward. If the ball slides without tactile resistance, the detents have taken a permanent compression set.
- Visual Feedneck Bore Inspection: Shine an LED inspection penlight directly down the feedneck with the bolt in the rearward rest position. Look for symmetrical orange or blue elastomer fingers extending 0.040″ to 0.050″ into the bore. If one side is missing, flat, or torn, bilateral replacement is mandatory.
Phase 2: Degassing & Eye Cover Disassembly Hygiene
Accessing internal detents requires disciplined fastener handling to prevent stripping delicate aluminum receiver threads:
- Complete Pneumatic Depressurization: Unscrew your HPA compressed air tank and dry-fire the marker twice through a barrel blocker to vent all residual gas stored in the inline regulator operating pressure chambers. Never service eye covers under pressure.
- Hex Driver Engagement: Most modern eye cover screws utilize miniature 5/64″ or 0.050″ button-head hex fasteners. Use a precision machined hex wrench (such as Bondhus Protanium) rather than cheap L-keys. Firmly seat the hex bit to full depth before applying counter-clockwise break-away torque to avoid stripping the shallow socket.
- Eye Ribbon Cable Safety: Carefully lift the aluminum eye cover plate. On modern electro-pneumatics, the infrared eye wire ribbon cable is seated directly alongside the detent pocket. Never pull aggressively on the cover plate; gently unseat the rubber detent finger without tugging the solder joints of the optical eye harness.
Phase 3: Elastomer Extraction & Cavity Solvent Decontamination
Dried gelatin paint residue behind detent pockets is the number one cause of premature detent failure:
- Detent Extraction: Using a curved dental pick or plastic probe, gently pry the worn rubber detent out of its receiver recess. On spring-loaded ball detents (Empire Axe), use an imperial hex key to unscrew the threaded brass assembly from the receiver wall.
- Cavity Degreasing: Saturate a lint-free foam swab with 99% anhydrous isopropyl alcohol. Thoroughly wipe down the detent seating pocket, the eye sensor lens, and the receiver bore. Remove all hardened paint fill, shell dust, and dried grease. Dried paint fill hardens into an abrasive crust that grinds down new detent rubber within 1,000 shots.
- Spring Coil Inspection: On spring-loaded markers, test the spring rebound. If the ball bearing does not snap back immediately when pressed with your fingertip, soak the unit in an ultrasonic alcohol bath or replace the complete assembly.
Phase 4: OEM Detent Installation & Torque Calibration
Installing fresh detents requires precise mechanical alignment:
- Elastomer Alignment: Press the fresh OEM rubber detent finger into the receiver recess. Ensure the mounting post sits completely flush against the aluminum receiver wall without twisting or pinching. On Tippmann markers, verify that the triangular curved barb points toward the rear hammer.
- Wire Routing & Cover Seating: Carefully lay the break-beam eye wire flat in its milled wire retention channel. Replace the eye cover plate, ensuring the plate does not pinch the eye wire or bind against the outer flange of the rubber detent.
- Micro-Torque Specification: Thread the eye cover screw in by hand first to prevent cross-threading. Tighten with your 5/64″ hex key to snug contact plus a 1/16-turn finish (approximately 2.5 to 3.0 inch-pounds). Over-tightening crushes the aluminum eye cover, pinching the detent finger into a rigid, non-flexing state that causes immediate ball clipping.
Phase 5: High-Cadence Bench Feed & Chronograph Validation
Confirm final mechanical reliability before taking your marker into competitive play:
- Manual Cycle Stroke: With the marker un-gassed, pull the bolt back and forward manually across 10 cycles. The bolt face should glide smoothly over the detent tips with a crisp, audible click as the fingers pop into place behind the bolt face, verifying zero mechanical interference.
- Static Inversion Repeat: Repeat the 180° inversion test with 3 consecutive paintballs. Each ball must remain firmly held in the breech until manually discharged.
- 10.5 BPS Ramping Verification: Air up the marker, attach your motorized tournament loader, and fire a 50-round string over a chronograph into a safety net. Confirm crisp single-ball ejection on every trigger pull with zero double feeds, zero First-Shot Drop-Off from bolt O-ring stiction, and zero liquid paint residue on the bolt face.
Under ASTM F1776 standard safety specifications and NXL Tournament Rule 7.2.1, discharging a marker that double-feeds or suffers uncontrolled ball roll-out is classified as a severe safety hazard. When two paintballs enter the barrel simultaneously, the rear paintball acts as a pneumatic hydraulic piston, wedging against the forward ball. If the shells fracture inside the barrel, high-velocity projectile fragments (“liquid shrapnel”) spray unpredictably out the barrel porting. Furthermore, a ruptured ball creates extreme barrel friction that can cause severe pressure spikes back into the electronic solenoid manifold or induce downstream pneumatic marker air leaks or trigger dangerous paintball velocity spikes on subsequent shots. Always service degraded detents immediately.
Advanced Troubleshooting: Resolving Recurrent Breech Chops & Roll-Out
If your marker continues to chop paint or double feed even after installing fresh paintball ball detents, the issue stems from secondary pneumatic or mechanical conflicts. Use our gunsmith matrix below to isolate the root cause:
| Feeding Symptom | Pneumatic Root Cause | Verification Diagnostic | Permanent Armorer Fix |
|---|---|---|---|
| Persistent Ball Roll-Out with New Detents | Extreme under-sized winter paint (.678″) slipping past standard 0.040″ detent tip. | Calibrate paint with a micrometer or Freak XL barrel insert; confirm diameter < .682″. | Install high-profile “heavy” detent fingers or shim detent base by 0.010″ using Teflon tape. |
| Double Feeding Only on 10.5 BPS Ramping | Motorized loader torque setting adjusted too high, forcing second ball past detent. | Single semi-auto shots feed cleanly; sustained 3-shot burst pushes 2 balls simultaneously. | Back off tension spring screw on DYE Rotor by 2 full turns; or lower Spire drive force setting. |
| Half-Clipped Shells on Bolt Face | Anti-chop eye delay timer set too low or dirty infrared eye lenses. | Inspect LED board indicator; eyes flash error code indicating optical obstruction. | Increase eye delay from 1ms to 3ms; clean eye lenses with isopropyl alcohol and dry swab. |
| Bolt Sticks Forward on Detent Finger | Crushed eye cover screw forcing detent finger into the direct bolt stroke channel. | Bolt requires manual push to cycle; rubber detent tip shows gouging or tear marks. | Loosen eye cover screw; torque strictly to 2.5 in-lbs; check dynamic bolt sail O-ring sizing. |
Essential Armorer Tools for Paintball Ball Detent Maintenance
Servicing miniature ball detents without damaging eye cables or aluminum threads requires dedicated gunsmith instruments:
| Essential Bench Tool | Armorer Functional Role | Recommended Source |
|---|---|---|
| Bondhus Protanium 5/64″ & 0.050″ Hex Drivers | Precision machined steel hex keys. Eliminates rounded socket heads on miniature eye cover screws. | |
| Stainless Steel Dental & O-Ring Pick Set | Fine-tipped curved probes for safely extracting torn rubber nubbins without scratching receiver anodizing. | |
| 99% Anhydrous Isopropyl Alcohol & Foam Swabs | Fast-evaporating solvent for dissolving dried paint fill behind eye covers without damaging optical plastic lenses. | |
| Universal Multi-Brand Ball Detent 10-Pack | High-grade 70-durometer replacement rubber nubbins and spring detents for tournament armory boxes. |
Technical Video Workshop: Live Workbench Ball Detent Replacement
To visualize eye cover plate removal, delicate ribbon wire handling, and proper directional rubber nubbin seating demonstrated on a live tournament bench, review this comprehensive armorer workshop:
Final Armorer Verdict: Long-Term Reliability vs Feeding Speed
In our armory evaluations across dozens of tournament events, maintaining flawless feed reliability requires respecting the mechanical physics of paintball ball detents rather than pushing loader force to the extreme. Follow these three cardinal field rules before stepping onto the staging line:
Replace in Matched Pairs
Never swap a single detent finger. Asymmetrical resistance causes the bolt face to tilt incoming paintballs, inducing violent breech chops. Always install bilateral factory pairs simultaneously.
Tune Stack Pressure
Excessive motorized loader tension pushes paint past brand-new detents. Back off your loader’s torque setting to maintain a balanced 3.0 to 4.0 PSI stack force.
Flush Broken Paint
Whenever a ball shatters in the barrel, pull eye covers and flush detent pockets with alcohol. Dried paint fill crystallizes into an abrasive wedge that shreds fresh rubber fingers.
Frequently Asked Questions: Paintball Ball Detents
How often should I replace paintball ball detents?
Under standard recreational and tournament use, paintball ball detents should be replaced every 20,000 to 25,000 rounds (approximately 10 to 12 cases of paint). However, you must inspect detents immediately following any catastrophic barrel break; dried paint fill and abrasive shell fragments can shear or fatigue detent fingers within a single game.
Why do paintballs roll down my barrel when my gun is pointed down?
Ball roll-out occurs when the physical protrusion of your paintball ball detents has degraded below 0.040 inches. This is caused by a torn rubber nubbin finger, a flattened DYE Eye Pipe detent clip, or a seized spring in a ball-bearing detent. Without physical friction at the equator of the ball, gravity pulls the ball past the detent ramp into the barrel bore.
Can worn ball detents cause my paintball marker to double feed?
Yes, double feeding is directly linked to worn detents. Motorized loaders exert 3 to 5 PSI of downward stack pressure. When detent fingers fatigue, this continuous stack force easily pushes the chambered ball forward into the barrel ramp, allowing a second ball to drop into the breech cavity. Both balls are then discharged simultaneously when the bolt cycles.
Should I put grease or oil on my paintball ball detents?
No, you should never lubricate paintball ball detents. Applying grease (such as Dow 33) or oil softens the molded rubber polymer, accelerating mechanical tear fatigue. Furthermore, wet lubricants attract dirt, paint dust, and shell residue, creating a sludge that coats and blinds your infrared anti-chop eyes.
Which way does the rubber detent nubbin face in a Tippmann 98 or A-5?
In Tippmann markers (part #TA02013), the triangular rubber nubbin must be installed so that the curved retention hook points rearward toward the bolt face. The flat vertical face of the nubbin faces forward toward the barrel muzzle. If installed backwards, incoming paintballs slide freely over the ramp and roll out of the barrel.