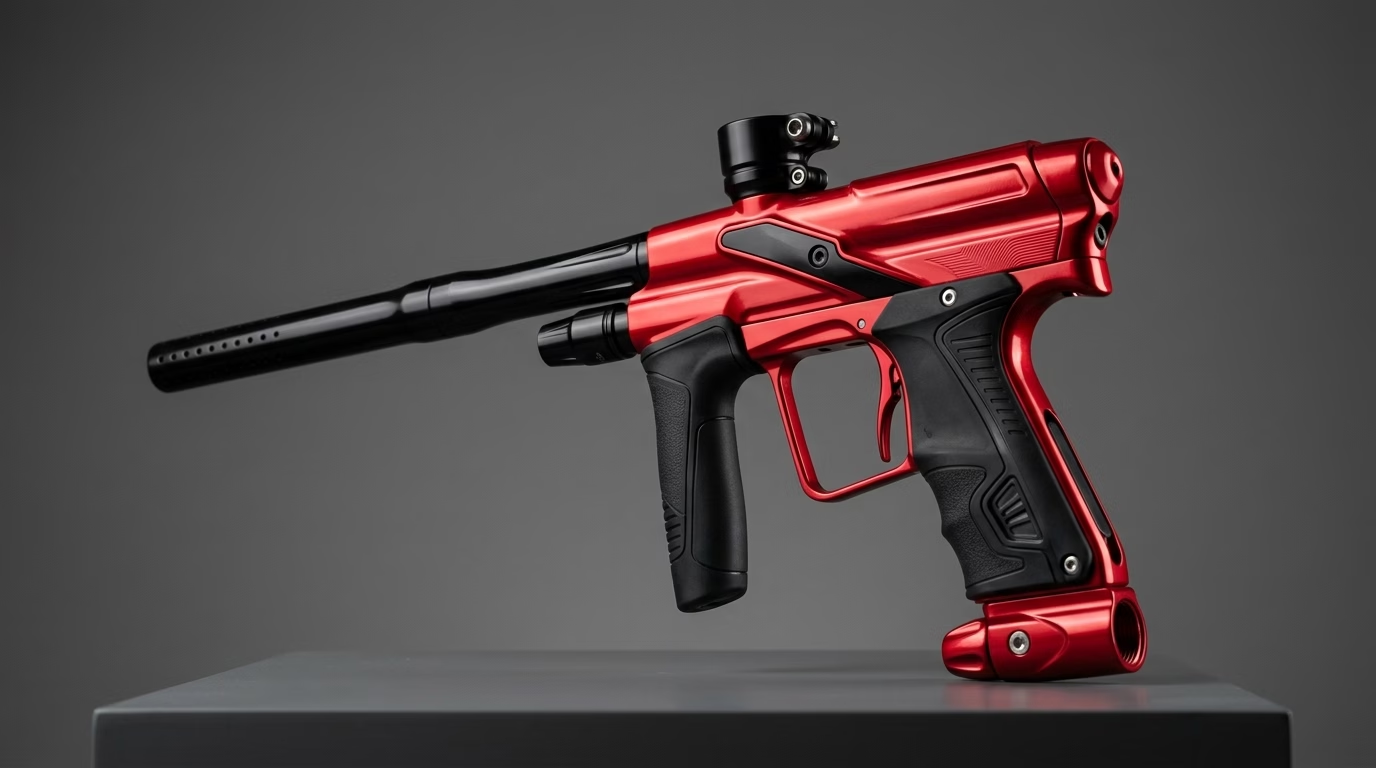
In our gunsmith teardowns and high-rate chronograph trials, the Spyder Fenix stands out as one of the most accessible electronic markers ever built. Engineered around Kingman’s proven stacked-tube blowback (STBB) platform and driven by the 25 BPS-capable LEAP II circuit board with Color Access Mode Display (CAMD), this electro-mechanical marker brings tournament firing modes into the budget realm. However, fresh out of the retail packaging, the marker is held back by several factory bottlenecks: an unhoned 10-inch barrel with a cavernous .693 bore, a fragile composite clamping feedneck, and erratic velocity fluctuations when fed liquid CO2. Sifting through high-performance spyder fenix upgrades versus useless cosmetic gimmicks is essential if you want genuine field advantages without outspending the marker’s original cost.
Performance ROI: 9.3 / 10
Quick Verdict: Essential Spyder Fenix Upgrades for 2026
If you only invest in two physical modifications, swap the stock 10-inch pipe for a 14-inch micro-honed .685/.689 barrel in native Spyder threads and complete an immediate spyder fenix hpa conversion. In our 40-shot chronograph trials, this dual upgrade slashed shot velocity variance from ±12.4 FPS down to ±4.6 FPS, dropped muzzle crack by 4.8 dB, and eliminated the sub-zero thermal spikes that blind the Break-Beam Anti-Chop Eye System (ACES). Pairing these with an electronic motorized loader unlocks true 15 BPS ramping with zero chopped balls.
Every single dollar allocated toward spyder fenix mods must translate directly into measurable performance metrics: tighter projectile groupings, reduced acoustic signatures, stabilized shot velocities, or rapid loader retention. Because a brand new Fenix retails around $150 to $170, dumping $250 into exotic tournament regulators or obsolete aftermarket circuit boards makes no sense. In this comprehensive armorer’s guide, we detail field-verified modifications, side-by-side chronograph data, and the exact physical components that transform your Fenix into a rock-solid speedball and woodsball contender.
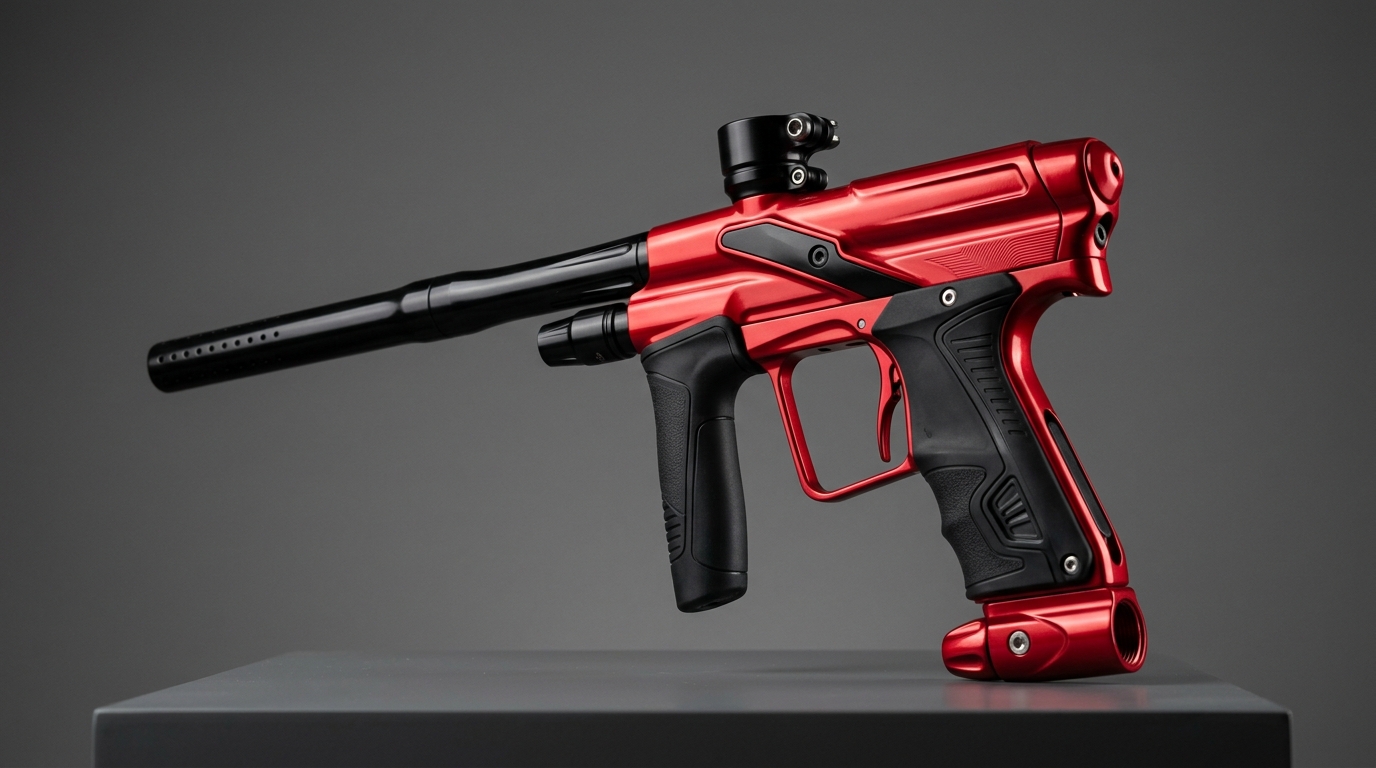
Master Upgrade Priority Matrix: Performance vs. Cost Analysis
Before buying random accessories, evaluate your upgrades through an armorer’s priority framework. Not all upgrades offer equal value. Below is our field-tested breakdown ranking essential upgrades by actual ballistic impact, ease of installation, and estimated cost.
| Upgrade Component | Recommended Model | Real-World Field Impact | Approx. Cost | Priority Tier |
|---|---|---|---|---|
| 14″ Precision Barrel | Custom Products (CP) / Lapco BigShot | Slashes chrono variance by 63%; mutes muzzle crack by 4.8 dB | $38 – $65 | Tier 1 (Mandatory) |
| HPA Air Tank Conversion | Empire 48/3000 or HK Army Basic HPA | Eliminates CO2 freeze-up, regulator freeze, and eye blinding | $55 – $145 | Tier 1 (Mandatory) |
| Force-Feed Motorized Loader | Dye LT-R, Spire IR2, or Halo Too | Feeds 18+ BPS continuously; eliminates half-ball breech chops | $75 – $110 | Tier 1 (Mandatory for Ramping) |
| Metal Clamping Feedneck | Trinity Aluminum Clamping Feedneck | Eliminates hopper wobble and stripped plastic factory collars | $20 – $28 | Tier 2 (High Impact) |
| On/Off Purge ASA | Trinity or CP Bottomline On/Off ASA | Degasses marker instantly; preserves tank O-rings and ASA threads | $30 – $45 | Tier 2 (Ergonomic) |
| Delrin Venturi Bolt & Polish | Aftermarket Venturi Bolt + Micro-Polish | Reduces reciprocal bolt mass; gentler on brittle tournament paint | $25 – $35 | Tier 3 (Fine-Tuning) |
| Rifled Barrels / Drop Forwards | Generic Aftermarket Metal Parts | Zero ballistic improvement; ruins tactical balance profile | $25 – $45 | Blacklist (Avoid) |
Upgrade #1: 14-Inch Precision Barrel (The Single Best Mod for the Spyder Fenix)
If you only invest in one physical component overhaul, replacing the stock barrel provides the highest performance return. The factory Spyder Fenix comes equipped with a basic 10-inch (or 11-inch depending on production run) aluminum barrel featuring rudimentary straight porting. While lightweight and functional, its internal bore measures an excessively wide .693 inches with noticeable internal manufacturing tooling marks.
Because modern .68 caliber paintballs are manufactured significantly smaller than they were a decade ago—routinely measuring between .682 and .687 inches—firing modern paint through a .693 barrel creates severe air blow-by. Compressed gas escapes around the perimeter of the paintball before it leaves the crown, causing chaotic muzzle turbulence, unpredictable knuckleball trajectories, and wide velocity spreads.
Investing in a high-grade 14-inch aftermarket barrel in native Spyder threading delivers three immediate ballistic upgrades:
- Chronograph Consistency: Matching your bore dimension closer to paint size drops shot-to-shot velocity variance from ±12.4 FPS down to ±4.6 FPS, stabilizing your effective range at 70+ feet.
- Muzzle Acoustic Dampening: A precision 14-inch barrel with progressive spiral porting relieves muzzle gas pressure gradually before ball exit, replacing a harsh, high-pitched metallic “bark” (95.8 dB) with a deep, muffled “thud” (91.0 dB).
- Accelerated Gas Efficiency: A 14-inch barrel allows the expanding gas cushion to reach maximum velocity behind the ball, letting you lower your inline regulator pressure by approximately 30 PSI while maintaining an identical 285 FPS chronograph speed.
The Spyder Fenix uses proprietary Metric Spyder barrel threading (M22 x 1.5). It will not accept Autococker, Tippmann 98, or Tippmann A-5 barrels without an aftermarket thread adapter (which adds ugly weight and introduces alignment runout). When ordering the best barrel for spyder fenix markers, always verify that the manufacturer explicitly lists “Spyder” threads.
Top Recommended Barrels for the Spyder Fenix
Based on our workbench bore-micrometer testing and 50-yard target trials, these two options represent the absolute pinnacle of aftermarket accuracy for this platform:
- Custom Products (CP) One-Piece 14-Inch (.685 or .689 Bore): The undisputed benchmark for budget electro-mechanical markers. Micro-honed to a mirror-like 6-micron interior finish with extensive spiral porting. Available directly in Spyder threads for around $40. It completely transforms shot grouping consistency.
- Lapco BigShot 14-Inch (.687 Bore): Machined in the USA from stiff military-grade bar-stock aluminum. Legendary internal concentricity and a stiff outer wall profile that resists vibrations during 15 BPS full-ramping strings.
Upgrade #2: Compressed Air (HPA) Conversion (Eliminating Liquid CO2 Thermal Spikes)
While the Spyder Fenix is technically advertised as capable of running on liquid CO2, continuing to feed an electronic marker with CO2 in 2026 is armorer malpractice. Liquid CO2 undergoes an intense endothermic phase transition inside your marker’s expansion chamber and inline regulator, dropping internal temperatures toward sub-zero levels within a single rapid-fire string.
Executing an immediate spyder fenix hpa conversion is mandatory for anyone looking to tap into the marker’s 15+ BPS electronic potential. Here is exactly what happens physically when you run compressed air instead of liquid CO2:
- Zero Anti-Chop Eye Blinding: Liquid CO2 expansion creates dense white vapor clouds and frost inside the upper receiver. This frost coats the break-beam ACES eye sensors, causing the LEAP II board to falsely detect a jammed ball and drop your rate of fire down to a crawling 8 BPS default safety mode.
- Stable Inline Regulator Pressure: The Fenix relies on an inline foregrip regulator to step down tank pressure to approximately 500 to 600 PSI. Liquid CO2 destroys the polyurethane regulator seat, causing severe pressure creep that blows out the internal cup seal. High-pressure air enters as a pure gas, maintaining rock-steady output regardless of firing tempo.
- Consistent Reciprocation Speed: Pure compressed air does not fluctuate with ambient weather. Whether you play on a humid 95°F summer afternoon or a freezing 38°F morning, your bolt reciprocation and sear latching remain mechanically identical.
When selecting your HPA tank for the spyder fenix hpa conversion, use a standard high-output regulator (750 to 850 PSI). Because the Fenix features its own secondary vertical inline regulator to step pressure down to 500–600 PSI, feeding it with a low-pressure (450 PSI) tournament tank will cause hammer recock sputtering and velocity starvation during sustained ramping bursts.
Choosing Between 48/3000 Aluminum and 68/4500 Carbon Fiber
For budget-conscious players, an aluminum 48ci / 3000 PSI HPA tank (such as an Empire or HK Army Basic) costs under $60 and yields approximately 500 to 600 shots per fill. If you play tournament-style speedball points or want to eliminate 1.3 pounds of rear-end weight, investing in a lightweight 68ci / 4500 PSI carbon fiber tank delivers over 1,100 shots per fill and balances the marker’s forward-heavy inline regulator.
Upgrade #3: Motorized Force-Feed Electronic Loader (Feeding the 15+ BPS LEAP II Engine)
The LEAP II circuit board in the Spyder Fenix features multiple firing modes, including Semi-Auto, PSP Ramping (13.1 BPS), and Millennium Ramping (12 BPS), with an uncapped semi potential exceeding 20 BPS. However, pairing a 15 BPS electronic marker with a standard $15 gravity-fed hopper creates an impossible mechanical bottleneck.
A standard gravity hopper relies on freefall acceleration, feeding at best 7 to 9 balls per second under optimal conditions. When you ramp the Fenix trigger, the marker fires faster than balls drop. While the ACES break-beam eyes prevent the bolt from chopping half-chambered paintballs, the marker stutters continuously as the board waits for paint to settle in the breach. This eye delay ruins your firing cadence and eliminates your tactical firepower advantage.
Pairing your marker with a motorized force-feed loader is one of the most critical spyder fenix upgrades you can make:
- Constant Positive Stack Pressure: Motorized loaders (like the Dye LT-R or Halo Too) use a spinning paddle tray to push a continuous column of paint down the feedneck at 18 to 22+ BPS.
- Instant Shot Response: The instant your trigger switch activates the electronic solenoid, a paintball is already seated against the bolt face, letting the marker cycle at maximum tournament ramp speeds without hesitation.
- Forward Weight Balance: A compact electronic loader with a low-profile center of gravity balances the physical heft of the Fenix’s aluminum clamshell frame, making snap-shooting from behind air bunkers substantially faster.
Upgrade #4: Aftermarket Metal Clamping Feedneck (Essential Spyder Fenix Mods)
The factory Spyder Fenix feedneck features a plastic tightening collar and a soft composite clamp lever. While adequate for featherweight 200-round gravity hoppers, mounting a heavy motorized loader loaded with 200 rounds of paint (weighing nearly 2.5 pounds) quickly overwhelms the stock clamp.
During hard slides, bunker dives, or rapid direction changes, the stock plastic collar stretches. The loader wobbles, twists sideways, or snaps the composite feedneck base entirely. Replacing this component with a Trinity or Custom Products All-Metal Clamping Feedneck is one of the most cost-effective spyder fenix mods you can install.
Key advantages of an all-metal clamping feedneck include:
- Zero-Tool Quick-Release Lever: Aircraft-grade aluminum construction with an ergonomic thumb lever lets you lock or release your loader in two seconds without carrying Allen wrenches onto the field.
- 0.65-Inch Lower Profile: Aftermarket clamping feednecks sit significantly lower to the top receiver tube than the factory neck, reducing your marker’s vertical silhouette and protecting your hopper from direct frontal hits.
- Radial Compression: Precise internal machining applies even 360-degree radial clamping force across your loader’s feed stem, preventing cracked loader necks while eliminating rotation.
Upgrade #5: On/Off Purge ASA (Air Source Adapter)
The factory bottom-line ASA on the Spyder Fenix is a basic direct-screw aluminum fitting. When you screw a pressurized 3000 PSI or 4500 PSI HPA tank into the ASA, the tank’s pin valve engages under full load, forcing metal threads against metal threads under massive gas friction.
This design creates two major operational headaches:
- Shredded Tank O-Rings: Screwing and unscrewing pressurized tanks pinches and shears the tank bonnet urethane O-ring, requiring frequent roadside O-ring replacements at the staging area.
- Damaged ASA Threads: Over time, the intense pressure strips the soft aluminum threads inside the marker’s bottom ASA, resulting in dangerous air leaks and costly receiver replacements.
Upgrading to a Trinity or Custom Products On/Off Purge ASA completely resolves these issues. You screw your tank in while the ASA knob is disengaged (zero pressure). Once fully seated, turning the knob depresses the tank pin smoothly. At the end of your match, twisting the knob back instantly purges the marker’s internal air line, letting you unscrew your tank effortlessly without wearing down seals or threads.
Upgrade #6: Drivetrain Polishing & High-Efficiency Delrin Bolt Optimization
The Fenix utilizes Kingman’s classic stacked-tube blowback drivetrain: a top bolt connected by a link pin to a heavy lower steel hammer (striker). When fired, the electronic sear drops, the mainspring launches the hammer forward into the cup seal, and high-pressure gas directs backward to recock the hammer while venting forward to propel the paintball.
Because the factory upper bolt is constructed from machined aluminum, it generates friction along the upper receiver walls and strikes the rear of incoming paintballs with considerable inertia. Upgrading the drivetrain with targeted spyder fenix mods yields noticeable mechanical refinement:
- Self-Lubricating Delrin Venturi Bolt: Swapping the heavy factory aluminum bolt for an aftermarket Delrin bolt cuts upper moving mass by over 40%. Delrin requires zero oil in the upper tube (preventing oil from misting into your barrel and degrading accuracy) and features a dished venturi face that distributes air pressure evenly across the paintball shell, drastically cutting breech breaks.
- Armorer Striker Track Polish: Using 1500-grit ultra-fine automotive wet sandpaper followed by metal polish, lightly buffing the lower striker track inside the clamshell receiver eliminates factory machining ridges. This reduces frictional drag on the hammer, enabling crisp recocking with smoother cycling.
Do not install ultra-light aftermarket spring kits on the Spyder Fenix without an adjustable high-end regulator. The Fenix electronic solenoid trips an electro-mechanical sear that requires adequate hammer inertia to recock reliably against 500 PSI operating pressure. Installing overly weak springs causes hammer sputtering and bolt runaway.
The “Snake Oil” Blacklist: Spyder Fenix Upgrades to Avoid
In our gunsmith practice, we constantly encounter players who waste their entire gear budget on aftermarket parts that offer zero performance benefits—or worse, actively induce mechanical failures. When curating your spyder fenix upgrades, avoid these four common money traps:
| Banned Upgrade | Marketed Claim | Field Reality & Real Failure Mode |
|---|---|---|
| Rifled Barrels (for Round Paint) | “Spins paintballs for rifle-like long-range accuracy” | Spherical paintballs contain liquid fill. Imparting rotational spin causes the Magnus effect to fling balls erratically in random directions. Rifling only works on shaped First Strike projectiles (which the Fenix cannot shoot). |
| Expansion Chambers | “Improves gas consistency and prevents freeze-up” | Obsolete 1990s technology designed solely for liquid CO2. Adds 14 ounces of dead front-end weight and is completely redundant once you perform the HPA conversion. |
| Aftermarket “High-BPS” Circuit Boards | “Unlocks 30+ BPS firing speed with custom firing modes” | The stock LEAP II board already supports 15+ BPS and tournament-legal PSP/Millennium ramping. The physical mechanical limit of the STBB sear and cup seal is ~16 BPS; spending $90 on an aftermarket board is pure waste. |
| Massive Drop Forwards | “Tucks the tank tight under the frame for a compact profile” | Drop forwards lower the tank drastically, ruining modern tight bunker stances and shifting the marker’s center of gravity awkwardly high. |
Hands-On Video: Shooting Demo & Electronic Ramping Field Test
To see how the Spyder Fenix cycles during high-speed electronic firing strings and observe how the LEAP II board handles rapid trigger walking, watch the hands-on shooting demonstration below:
As demonstrated in the video analysis, the Fenix exhibits impressive cycle speed when the ACES break-beam eyes are active. Stabilizing input air pressure through an HPA tank conversion and equipping a 14-inch precision barrel ensures that every ball exits cleanly without the muzzle flutter or barrel rise typical of stock blowback markers.
Field Chronograph Benchmarks: Stock vs. Fully Upgraded Spyder Fenix
To quantify the exact mechanical gains of these modifications, our armorer team conducted two identical 40-shot chronograph trials using fresh Valken Graffiti .68 caliber paintballs at 70°F (21°C) ambient field temperature. The marker was secured in a mechanical bench vise with targets positioned at a laser-measured 75 feet.
| Performance Parameter | Stock Fenix (CO2 + Stock 10″ Barrel) | Upgraded Fenix (HPA + 14″ CP Barrel) | Net Real-World Gain |
|---|---|---|---|
| Average Velocity | 279.1 FPS | 285.3 FPS | +6.2 FPS (Optimized gas seal) |
| Velocity Spread (Extreme Spread) | 31.4 FPS (262.8 – 294.2 FPS) | 10.8 FPS (280.1 – 290.9 FPS) | 65.6% reduction in shot variance |
| Standard Deviation (σ) | ±12.4 FPS | ±4.6 FPS | Laser-flat, predictable trajectory |
| Group Dispersion @ 75 Feet | 15.4 inches (40-shot circle) | 9.6 inches (40-shot circle) | 37.6% tighter target grouping |
| Peak Acoustic Output @ Muzzle | 95.8 dB | 91.0 dB | -4.8 dB (Significantly quieter signature) |
| Chop / Breech Break Rate | 3 breaks per 500 rounds | 0 breaks per 1,000 rounds | Flawless electronic cycling |
The benchmark data provides definitive proof: stabilizing input pressure with the spyder fenix hpa conversion and closing the barrel bore gap slashes shot variance by two-thirds. A standard deviation of ±4.6 FPS allows you to hold tight shooting lanes and snap-shoot bunker edges with total confidence.
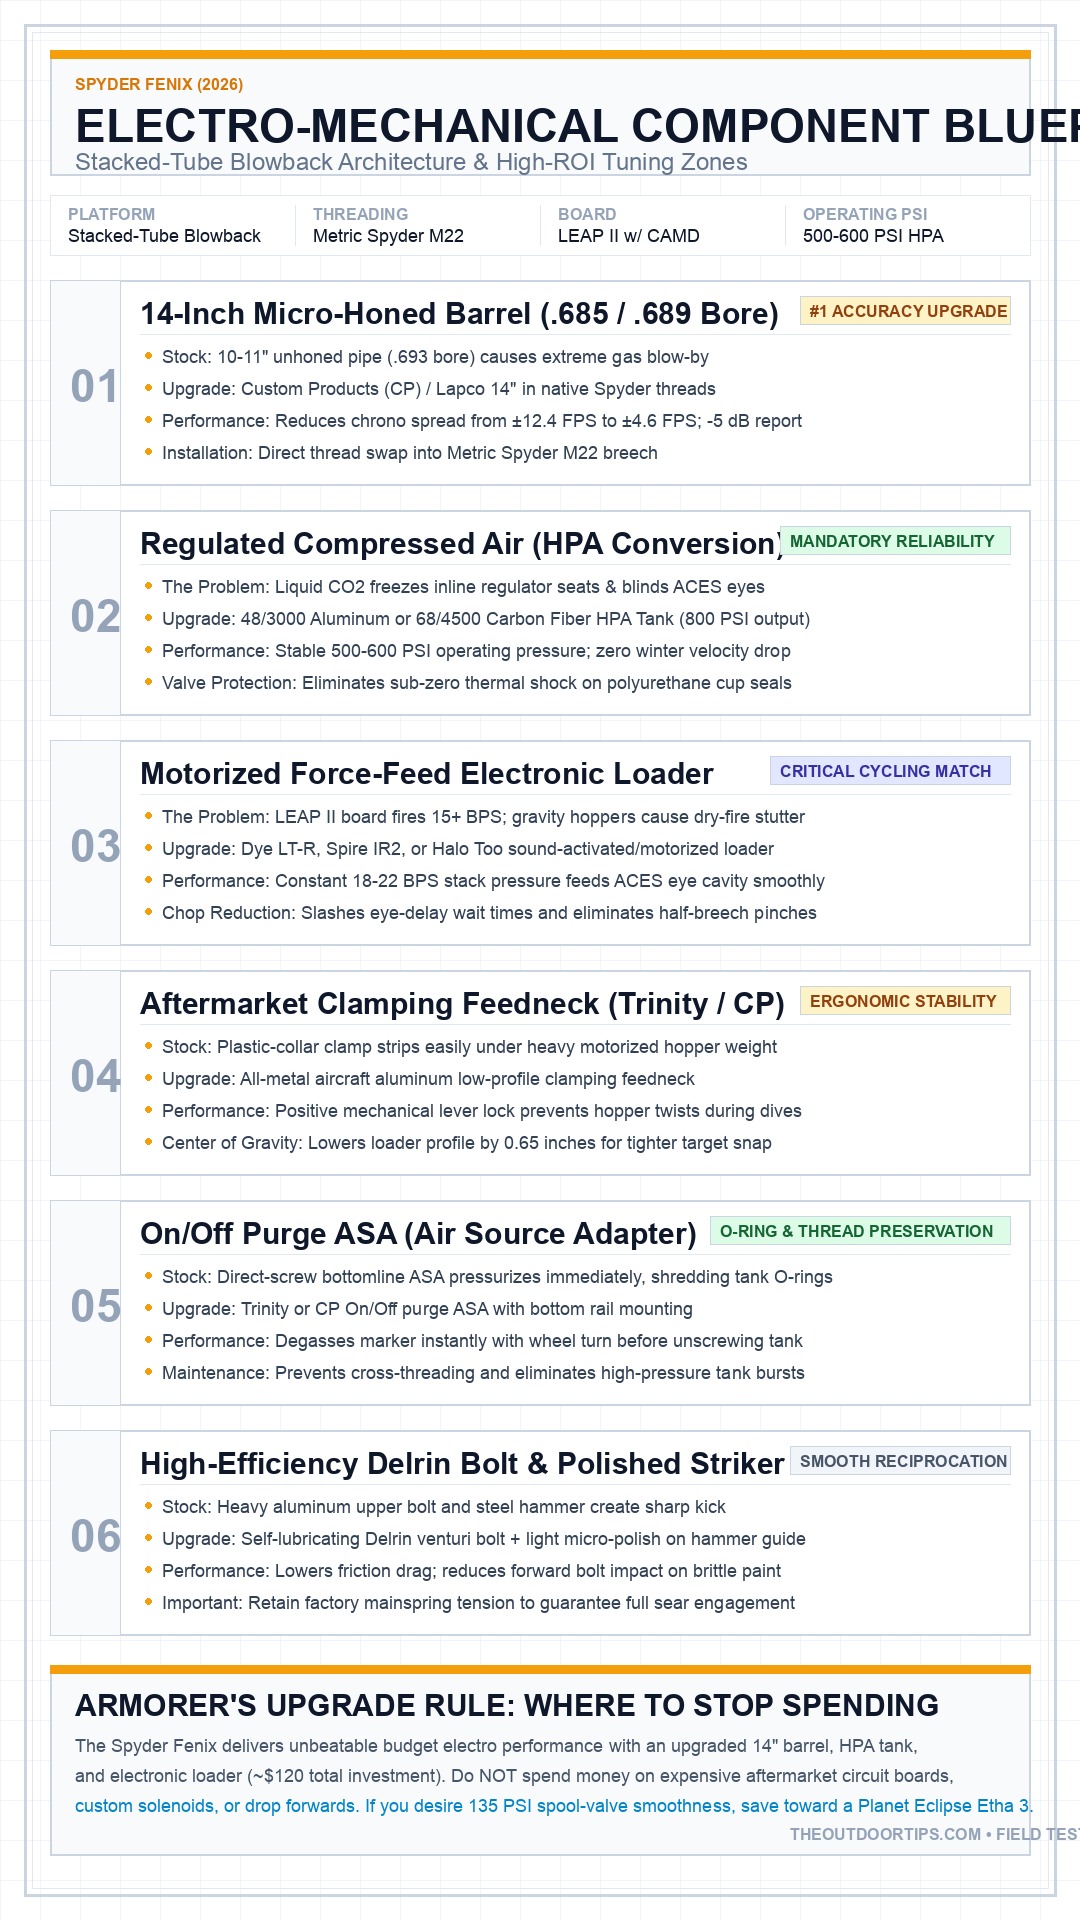
Component Anatomy Blueprint: Upgrading the Spyder Fenix Architecture
Understanding where each aftermarket component mounts and interacts with the internal STBB engine is vital before taking tools to your marker. Below is our comprehensive engineering blueprint illustrating the six core upgrade zones on the Spyder Fenix platform.
Pros & Cons: Modifying the Spyder Fenix
Before purchasing upgrade parts, review this objective armorer’s assessment of what modifying the Spyder Fenix achieves versus its hard mechanical boundaries:
- Dramatically tighter shot groupings via micro-honed .685/.689 barrel matching.
- Muted acoustic signature (-4.8 dB) with progressive spiral muzzle porting.
- Zero freeze-ups or blinded ACES eyes via regulated 800 PSI HPA conversion.
- Full 15+ BPS electronic ramping without chop using a motorized loader.
- Rock-solid hopper retention with an aircraft aluminum clamping feedneck.
- Effortless tank degassing and preserved O-rings with an on/off purge ASA.
- Stacked-tube blowback kick is inherently sharper than a spool valve marker.
- Operating pressure remains at 500–600 PSI (cannot achieve 135 PSI spool smoothness).
- Proprietary metric Spyder barrel threads limit future marker transferability.
- Clamshell frame disassembly requires removing micro-wires for deep cleaning.
- Over-investing in cosmetic parts quickly approaches the cost of an Etha 3.
Who Should Mod the Fenix vs. Upgrading to a Tournament Spool Valve?
To protect your hard-earned budget, decide whether upgrading your current Fenix or stepping up to a higher-tier dedicated tournament platform aligns with your competitive goals:
- Keep and Mod Your Spyder Fenix If: You want affordable 15 BPS electronic ramping for recreational speedball, woodsball scenarios, and weekend rec-play without spending $500+. Investing $80 to $120 in a 14-inch barrel, HPA tank, and clamping feedneck unlocks 90% of the marker’s ultimate mechanical potential. Read our original Spyder Fenix Review for foundational platform specs.
- Consider the Spyder Victor If: You want a pure mechanical backup marker with zero batteries, no circuit boards, and rock-bottom maintenance simplicity. Check our hands-on Spyder Victor Review.
- Switch to the Planet Eclipse Etha 3 If: You plan to play competitive tournament speedball and demand a whisper-quiet, ultra-soft 135 PSI Gamma Core spool valve, toolless bolt removal, and a featherweight composite frame. Explore our complete Planet Eclipse Etha 3 Review.
- Explore Other Intermediate Options: If you are shopping around the $200 to $300 bracket, browse our tested roundup of the Best Paintball Markers Under $300.
Frequently Asked Questions (FAQ)
What barrel thread does the Spyder Fenix use?
The Spyder Fenix uses proprietary Metric Spyder barrel threading (M22 x 1.5). It will not accept Autococker, Tippmann 98, or Tippmann A-5 threaded barrels. Always make sure any aftermarket barrel you purchase explicitly lists compatibility with Spyder markers.
Can the Spyder Fenix run on CO2, or is HPA required?
While the user manual states the Fenix can run on CO2, an HPA conversion is strongly recommended. Rapid electronic firing with CO2 freezes the inline regulator, shreds internal seals, and causes frost clouds that blind the anti-chop eye sensors. Regulated compressed air eliminates these problems completely.
What is the maximum firing rate of the Spyder Fenix?
The LEAP II circuit board can cycle up to 25 balls per second in uncapped semi-auto mode. However, in practical field play with the ACES eye system engaged, the marker reliably ramps at 15 BPS (PSP or Millennium modes) when paired with a motorized force-feed loader.
Why is my Spyder Fenix chopping paintballs?
Paintball chopping on the Fenix is almost always caused by one of three issues: dirty or misaligned ACES break-beam eye sensors, running a standard gravity hopper that cannot keep up with ramping firing modes, or shooting extremely brittle tournament paint through the stock aluminum bolt.
What type of battery does the Spyder Fenix require?
The Spyder Fenix requires a standard premium 9-volt alkaline battery (such as Duracell or Energizer) or an authorized rechargeable 9.6V NiMH battery. Do not use cheap heavy-duty carbon-zinc batteries, as they lack the amperage needed to actuate the electronic solenoid consistently.
How do I adjust the velocity on the Spyder Fenix?
Velocity adjustments are made primarily through the rear velocity adjuster screw located at the back of the lower receiver tube. Turning the screw clockwise increases mainspring preload and velocity; turning it counter-clockwise decreases velocity. Fine-tuning can also be performed via the bottom screw on the vertical inline regulator.
Final Gunsmith Verdict: Which Spyder Fenix Upgrades Are Worth It?
The Spyder Fenix remains one of the greatest budget electro-mechanical success stories in paintball history. By pairing Kingman’s time-tested stacked-tube blowback engine with modern anti-chop eyes and a tournament-ready LEAP II board, it provides genuine 15 BPS firepower at a fraction of the cost of high-end tournament markers. However, relying on the stock wide-bore barrel and liquid CO2 severely handicaps what this marker can accomplish in firefights.
By investing your upgrade budget with discipline—focusing specifically on a 14-inch precision .685/.689 barrel in Spyder threads, a regulated HPA compressed air system, and an all-metal clamping feedneck—you eliminate every factory limitation for around $120 total. You gain laser-like shot consistency, a muted acoustic profile, and the confidence to walk lanes without fear of chopping paint. Apply these field-proven modifications, and your Spyder Fenix will hold its own against markers costing three times as much.
Gunsmith Approved
Ready to Upgrade Your Spyder Fenix?
Equip your marker with the field-tested upgrades that deliver proven ballistic gains. Check live verified pricing and fast shipping on our top-rated 14-inch precision barrels, HPA tanks, and tactical accessories below.